Bandgrind Experiments | Padonma Network
Handmade QR codes woven on bands

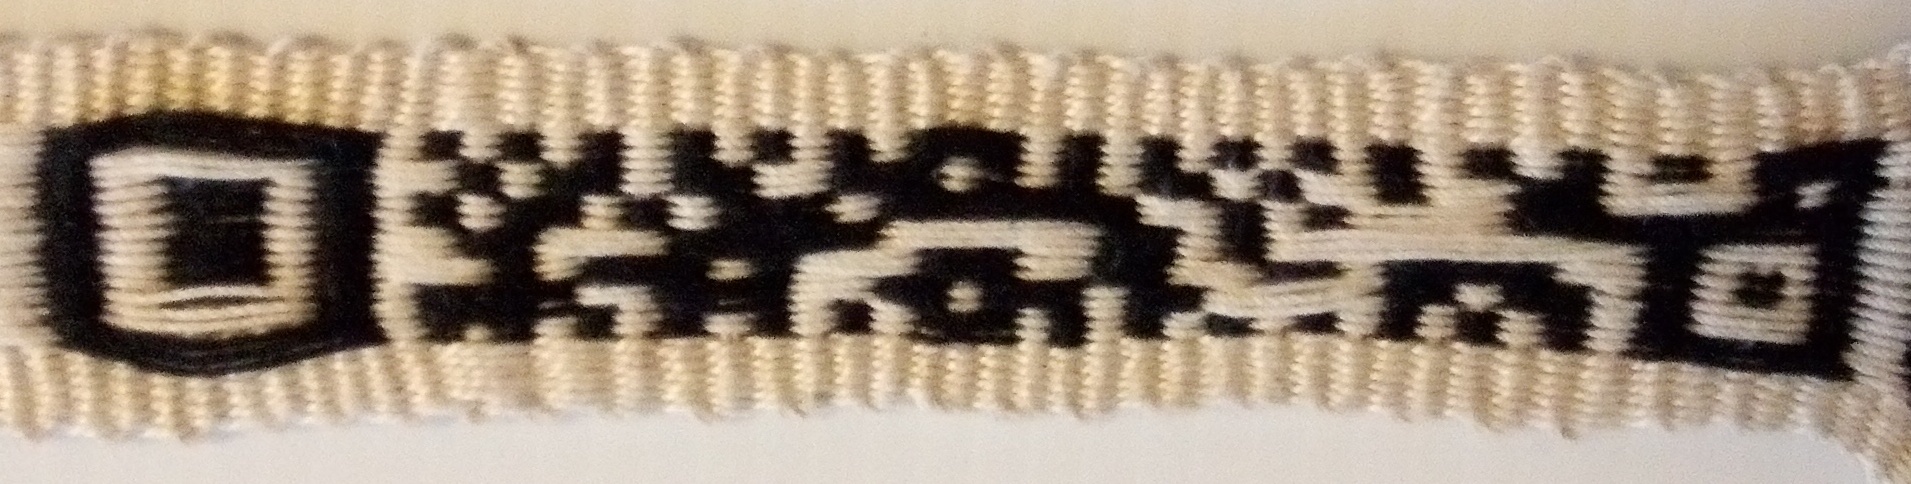
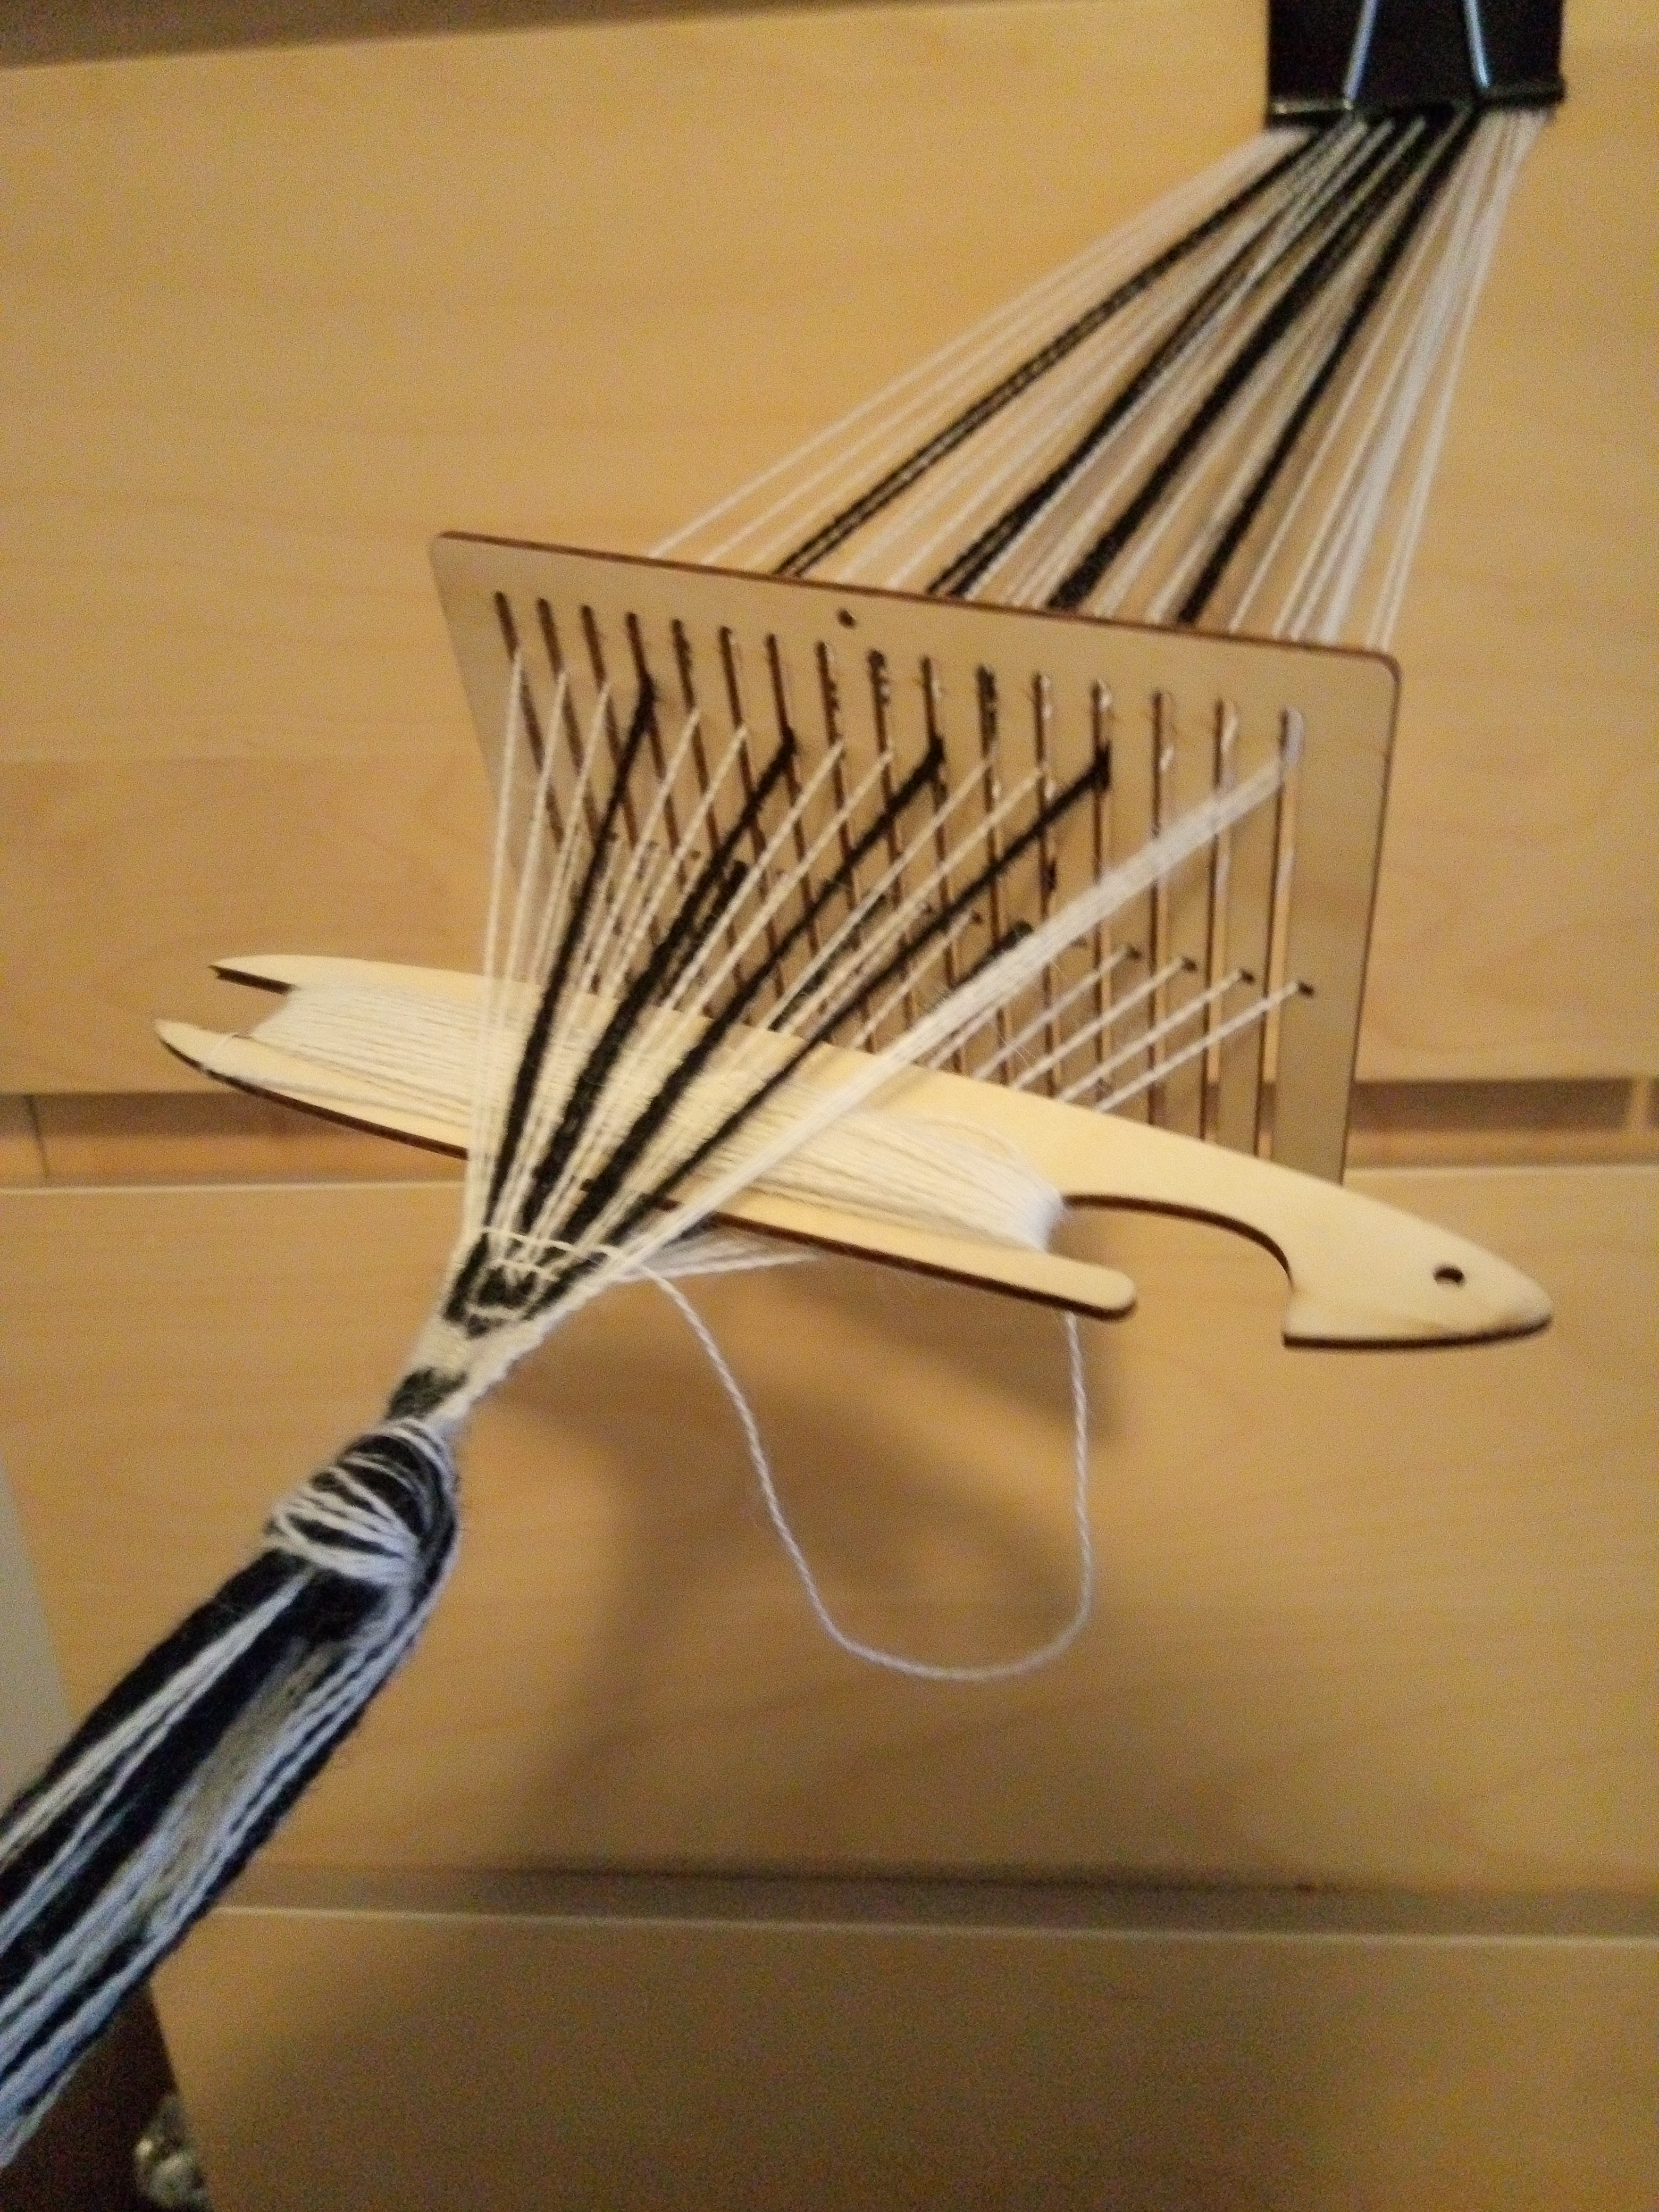
Figure 2: An rMQR band, handwoven on the following rigid heddle, a.k.a. bandgrind
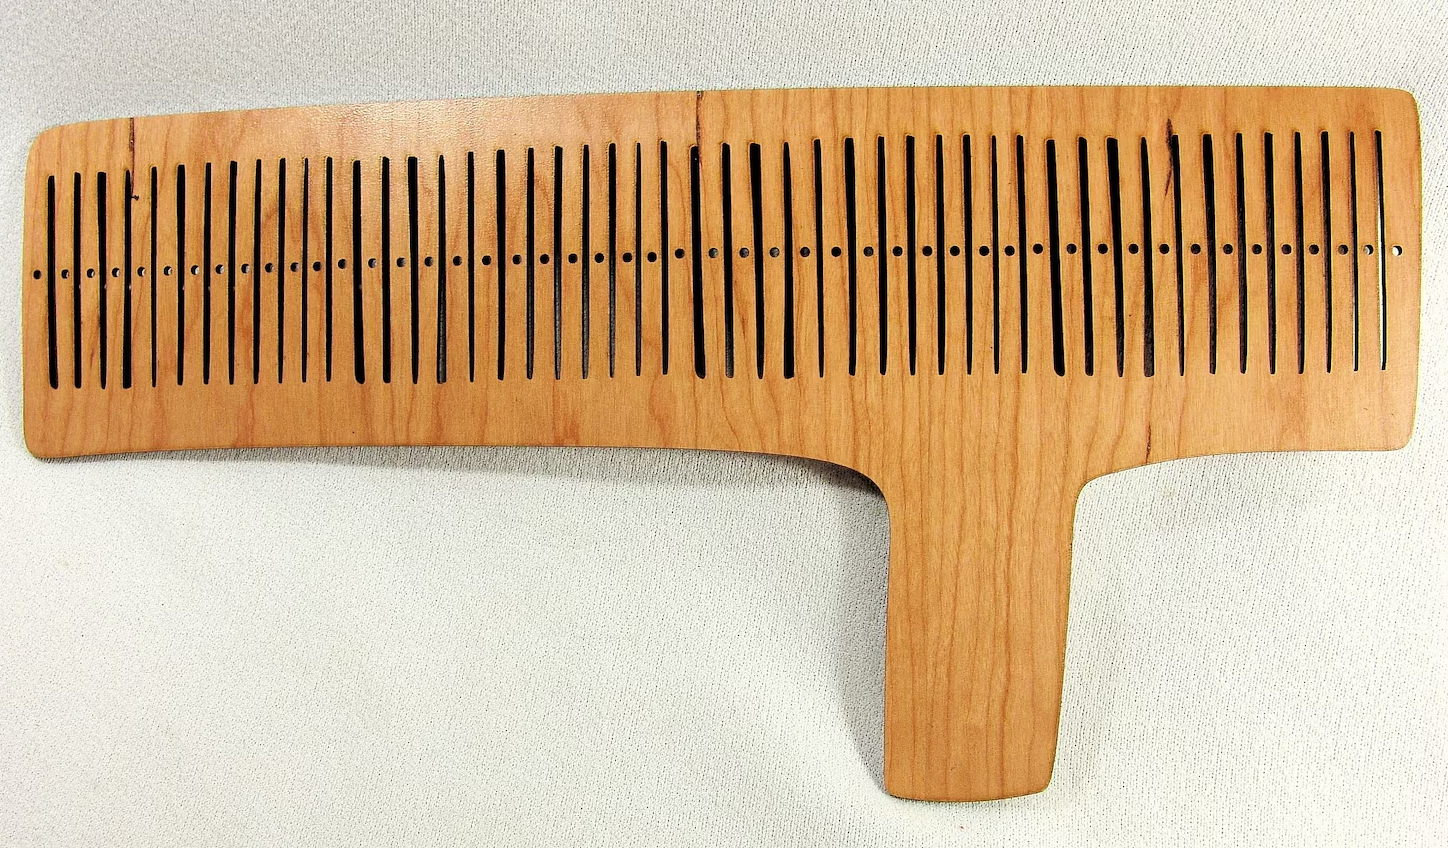
Figure 3: The bandgrind upon which the above band was woven
Version: 2.4.2
Bandgrind Experiments
Introduction
The Padonma Network project seeks to encode UUIDs in QR codes handwoven into bands. This mini blog records various band weaving experiments carried out in order to discover how best to go about such encoding using a simple traditional rigid heddle, which the Sweeds call a bandgrind. (To hear how a Sweed would pronounce "bandgrind" listen to Google Translate pronounce "bandgrind.")
The goal of these bandgrinding sessions is to do a full write and subsequent read test of rMQR ID bands. The "write" part of the test is the weaving of the bands. The "read" part is QR reader software successfully scanning the woven rMQR codes.
Success is pretty much guaranteed as there are many examples on the web of previously handwaven square QR codes, and rMQRs are simply a variant of QR. The real question is how fast and easy can it be done with minimal weave tooling.
There is an on-line rMQR generator which can be used to create downloadable rMQR code PNG images which encode arbitrary messages|data. That tool was used to create the first test rMQR being handwoven, the following R7x43 rMQR code:
Note, the above R7x43 rMQR only encodes five text characters (~40 bits). All UUIDs are 128 bits and so require an rMQR of size R7x77. A real UUID encoded to an R7x77 rMQR will be the second test subject.
The rMQR standard, ISO/IEC 23941, was ratified by ISO in May of 2022, and by the end of 2023 there were multiple free software apps that could read rMQRs. Although, at the dawn of 2024 neither the Android nor iOS default camera apps could yet read rMQRs. So, this particular innovation is still diffusing to the mainstream devices. Nonetheless, free apps such as QRQR and Scandit are capable of recognizing rMQR codes. (Someone found QRQR to be able to scan more codes than Scandit.)
The above QR code is part structure and part encoded data (think: envelope versus letter). The follow illustrates only the structure part:

As for why handwoven QR code bands would be useful (and why not just print the codes?), read the intro to the Padonma Network.
Testing tools
- QRQR is a free app that can read rMQR codes.
- iOS: QRQR - QR Code® Reader on the App Store
- Android
- Android QRQR - QR Code® Reader - Apps on Google Play
[ ]From Denso or from this arara?
- Android QRQR - QR Code® Reader - Apps on Google Play
Bandgrinding experiments
There are many variables that can affect the handweaving of rMQR ID bands (the writing of data to band) and how well QR reader software can read the bands. The purpose of this mini-blog is to record various experiments seeking to find the cheapest, easiest, fastest way to handweave rMQR ID bands.
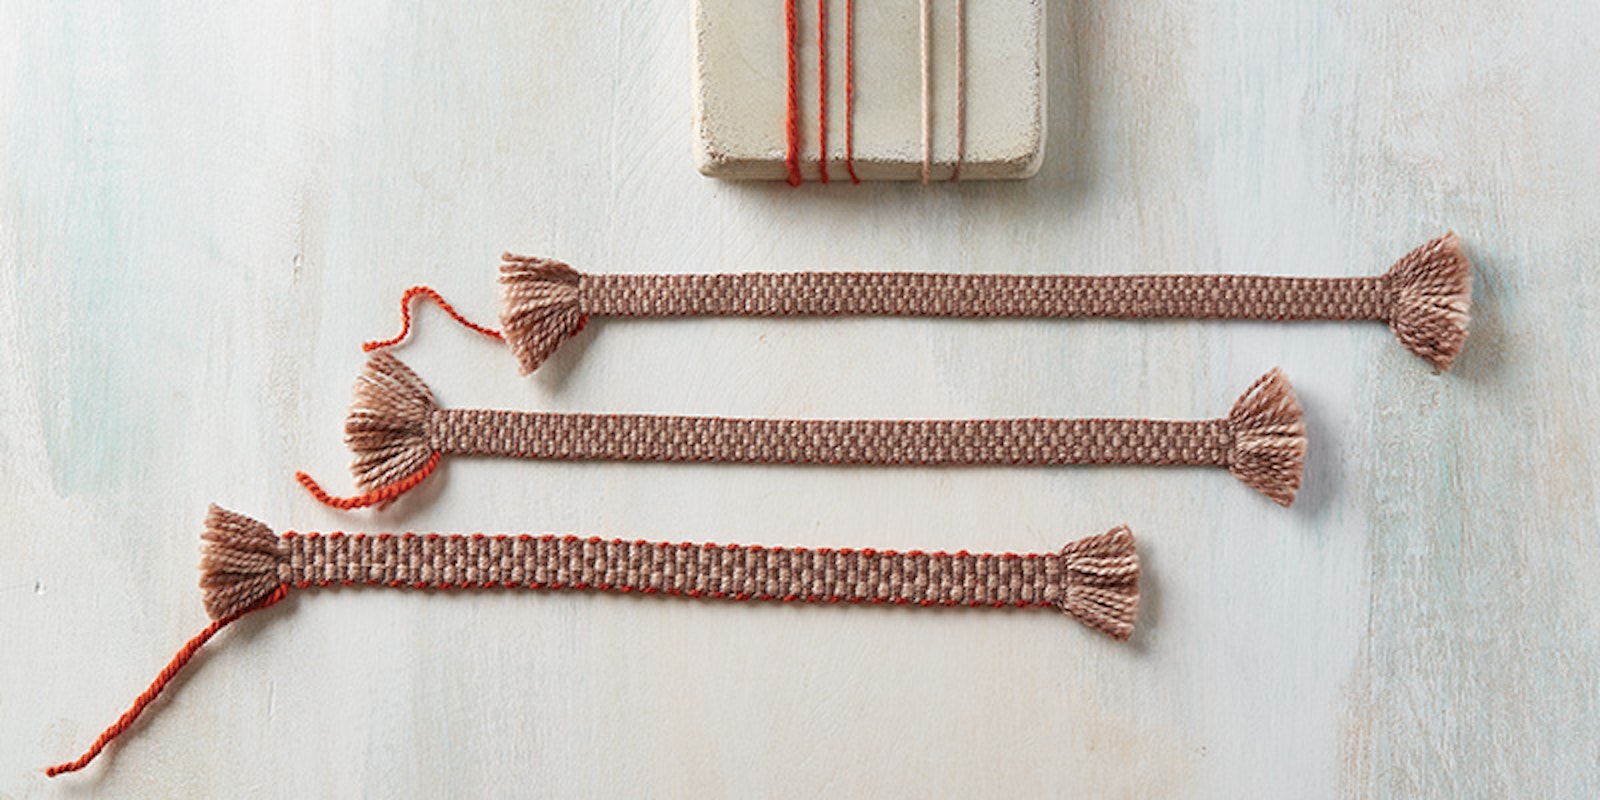
For example, the following image shows three bands, that essentially differ only in weft thread size. Obviously a dialed-in size ratio of warp thread to weft thread would make it easier to make better rMQR ID bands. Three warp thread wide QR modules ("modules" ~= "pixels") work well. But perhaps with the right combination of warp and weft thread it could be gotten down to two warp threads wide QR modules (not shown in the below image) which might be more quickly ground out. So, experiments need to be done to test that.
Another experiment might be to figure out how to bandgrind with only one type of thread (say, cheap white cotton, which could be locally dyed dark to get two colors). That imposes the requirement that the size ratio of warp:weft must be 1:1. What encoding weave would work in that context?
An extremely talented weaver might even be able to get down to 0.25mm per module (a single stictch, one stitch per module). At that scale, an R7x77 rMQR would be approximately 2mm x 20mm. That (single stitch per module) certainly seems to be what is currently being done in India by some handloomers.
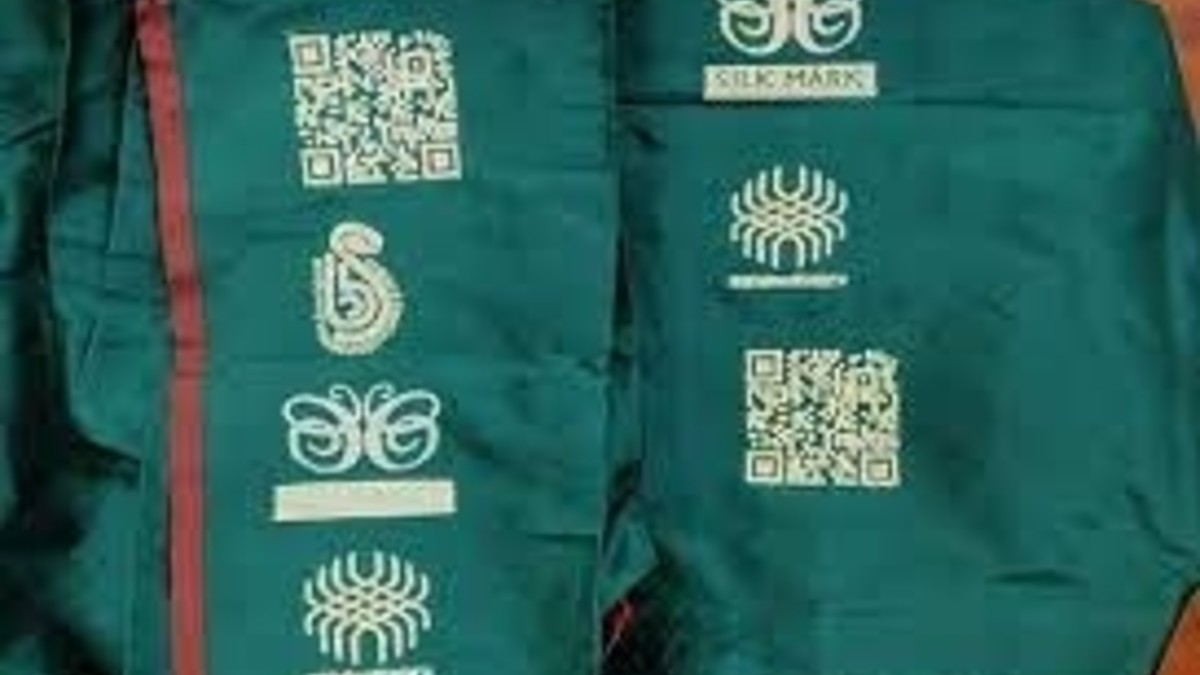
Figure 7: "Banarasi Saree To Have QR Code Woven In" (LatestLY, 2019)
Which sizes of rMQR are optimal in terms of trade off of width (number of warp thread ends) versus length (number of picks, a shuttle pass left or rigth)? A tablet weaver would probably be less bothered by width than a shuttle weaver (that is without the square cards that are used in tablet weaving).
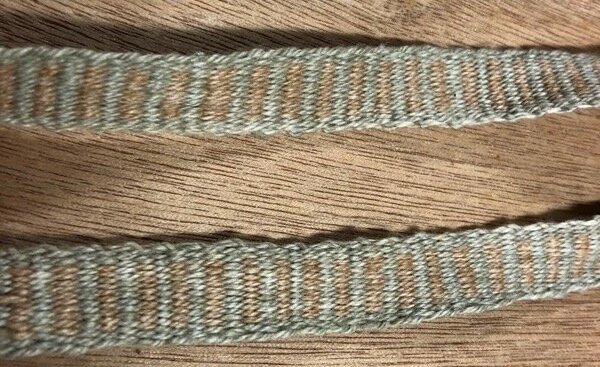
We need test cases to see how much human variability can be handled by QR reader software. Consider this example of a handwoven band with uneven beat leading to irregular lines. Would an rMQR ID band woven as irregularly shaped as this band be scanable? Or would it be unscannable?
Essentially we need to handweave some rMQR ID bands and see if QR readers will recognize the QR codes woven into the bands. Success is pretty much guaranteed so the main question is how fast, easy, and cheap can it be done at low scale. This "blog" includes a record of some experiments.
Session #13
This is actually three mini-sessions that spanned two days, ending on
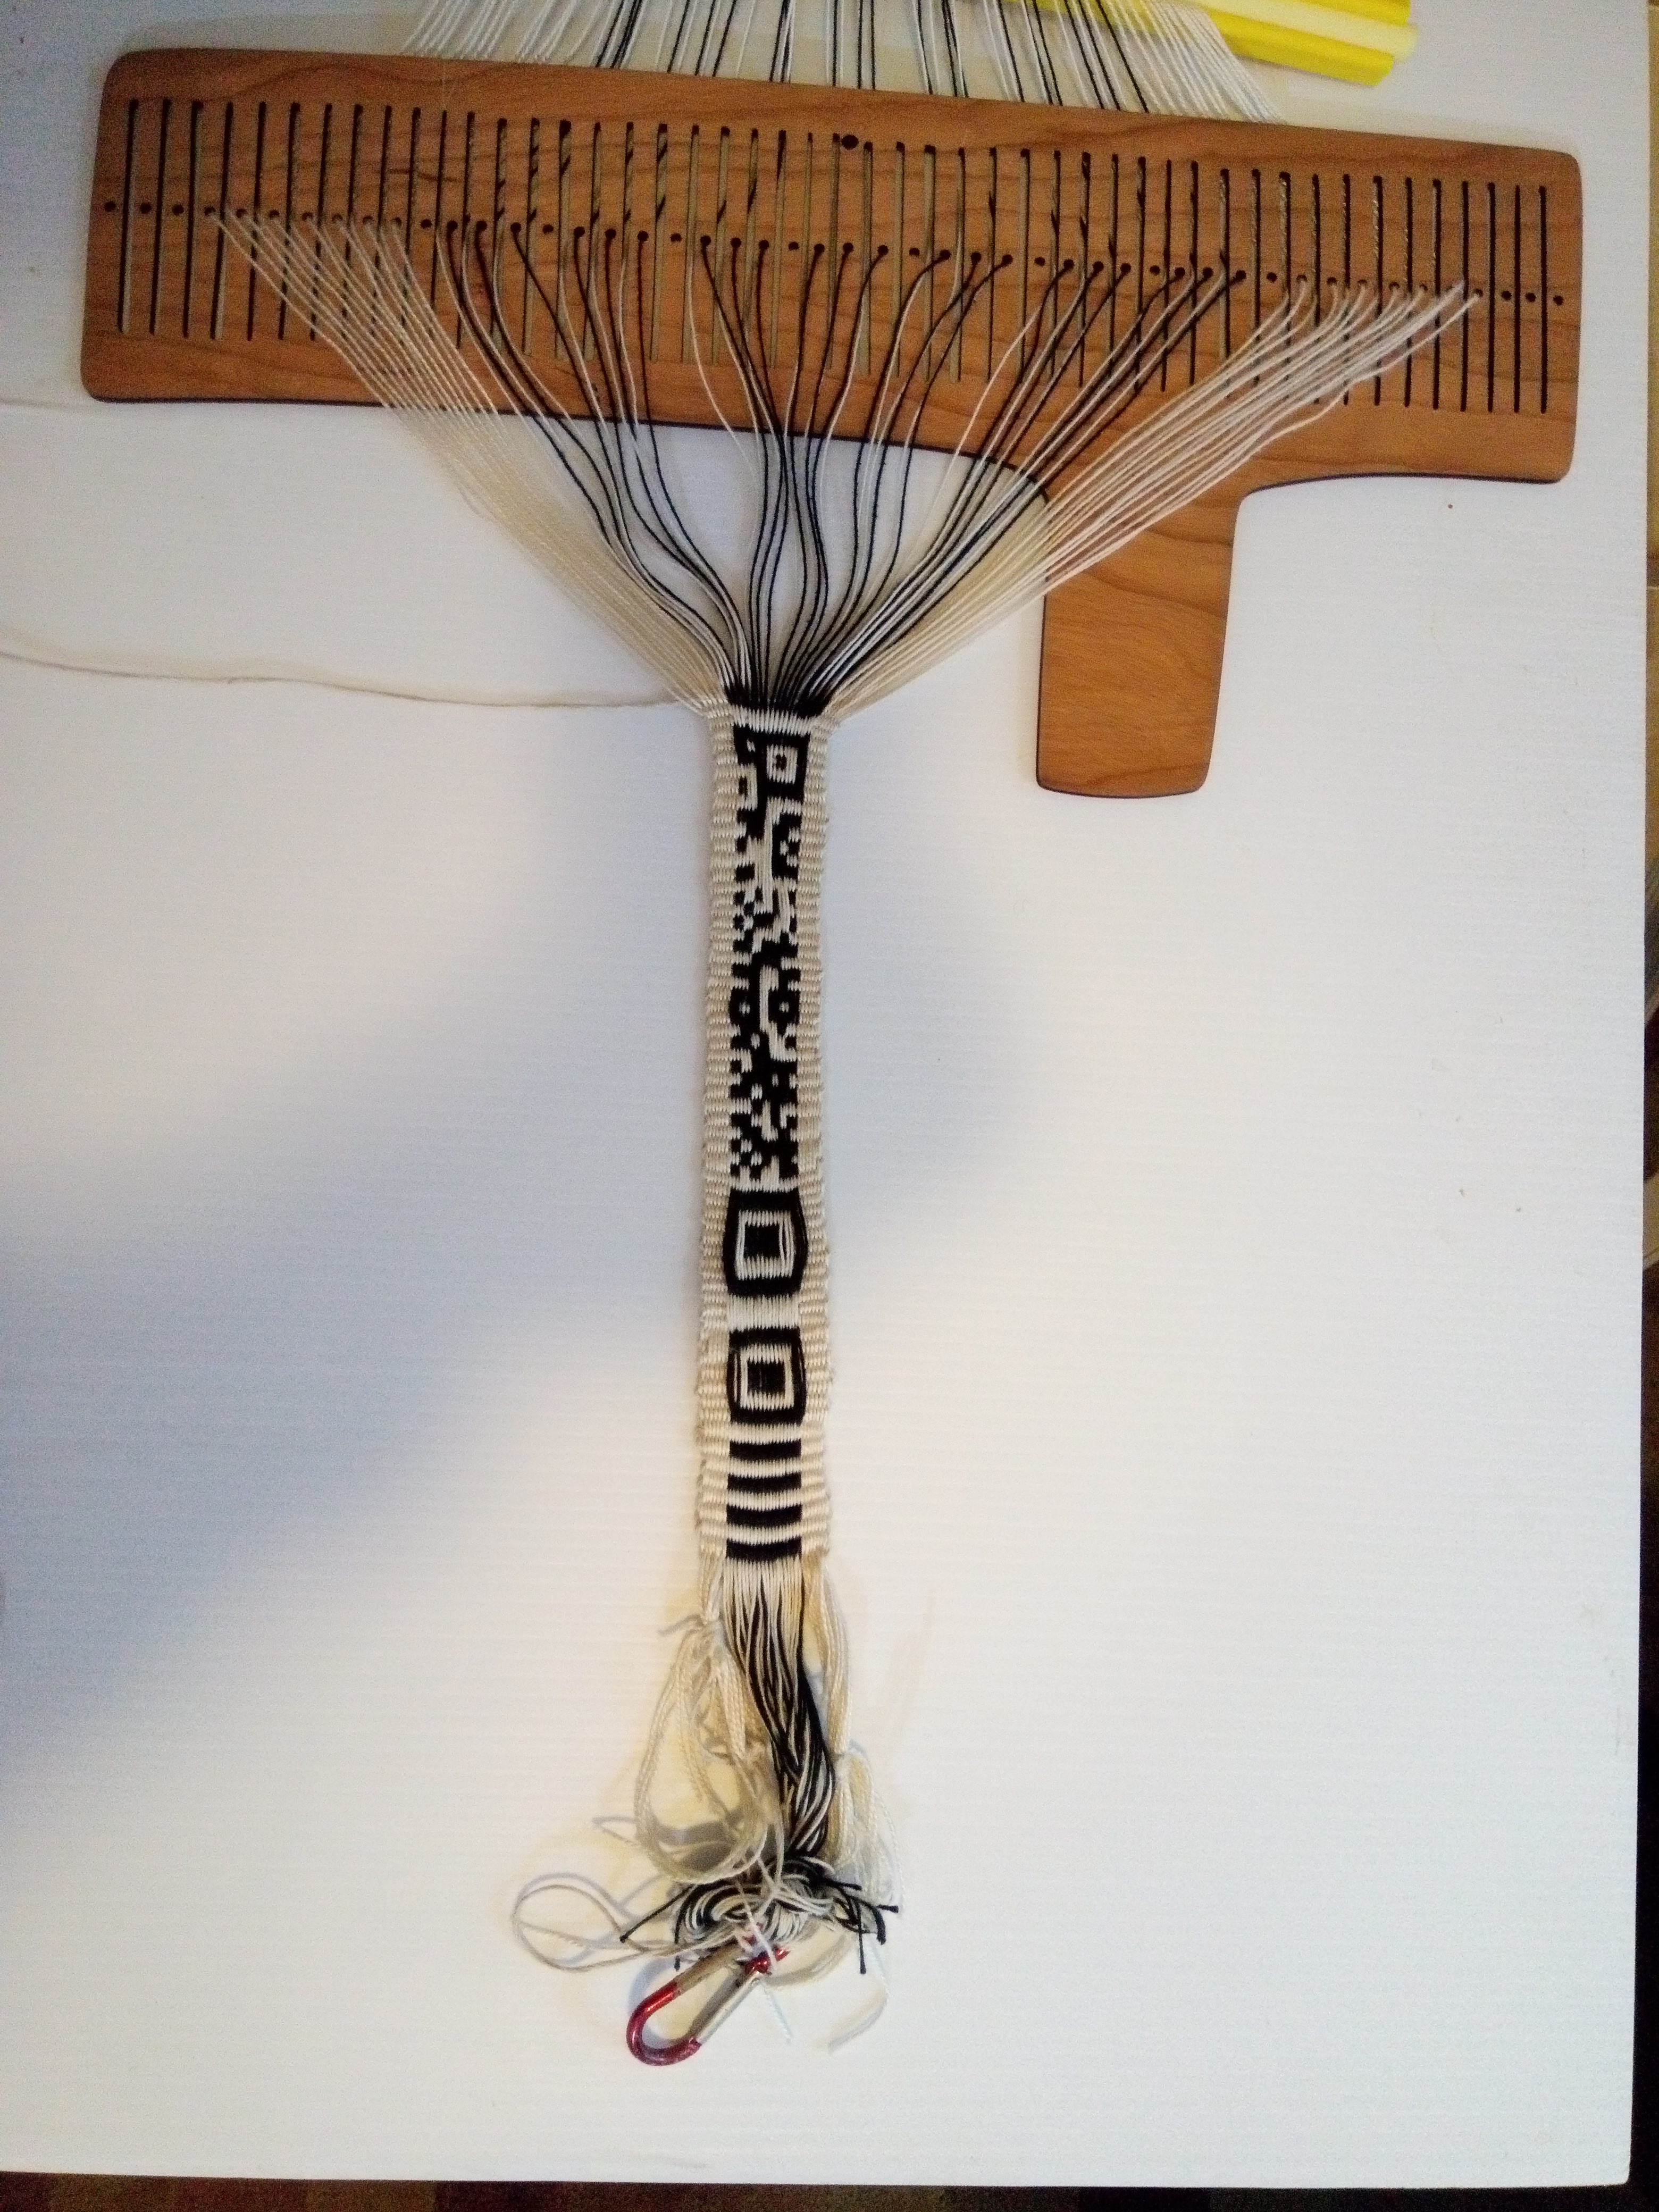
Figure 9: Band #5 on Heddle #2, end of Session #13
Session #12
This was the first session to get beyond just the finder symbol (the siz3 7 1-1-3-1-1 square that a starts all rMQR codes. This session ground out a finder symbol and half the data code body of the rMQR.
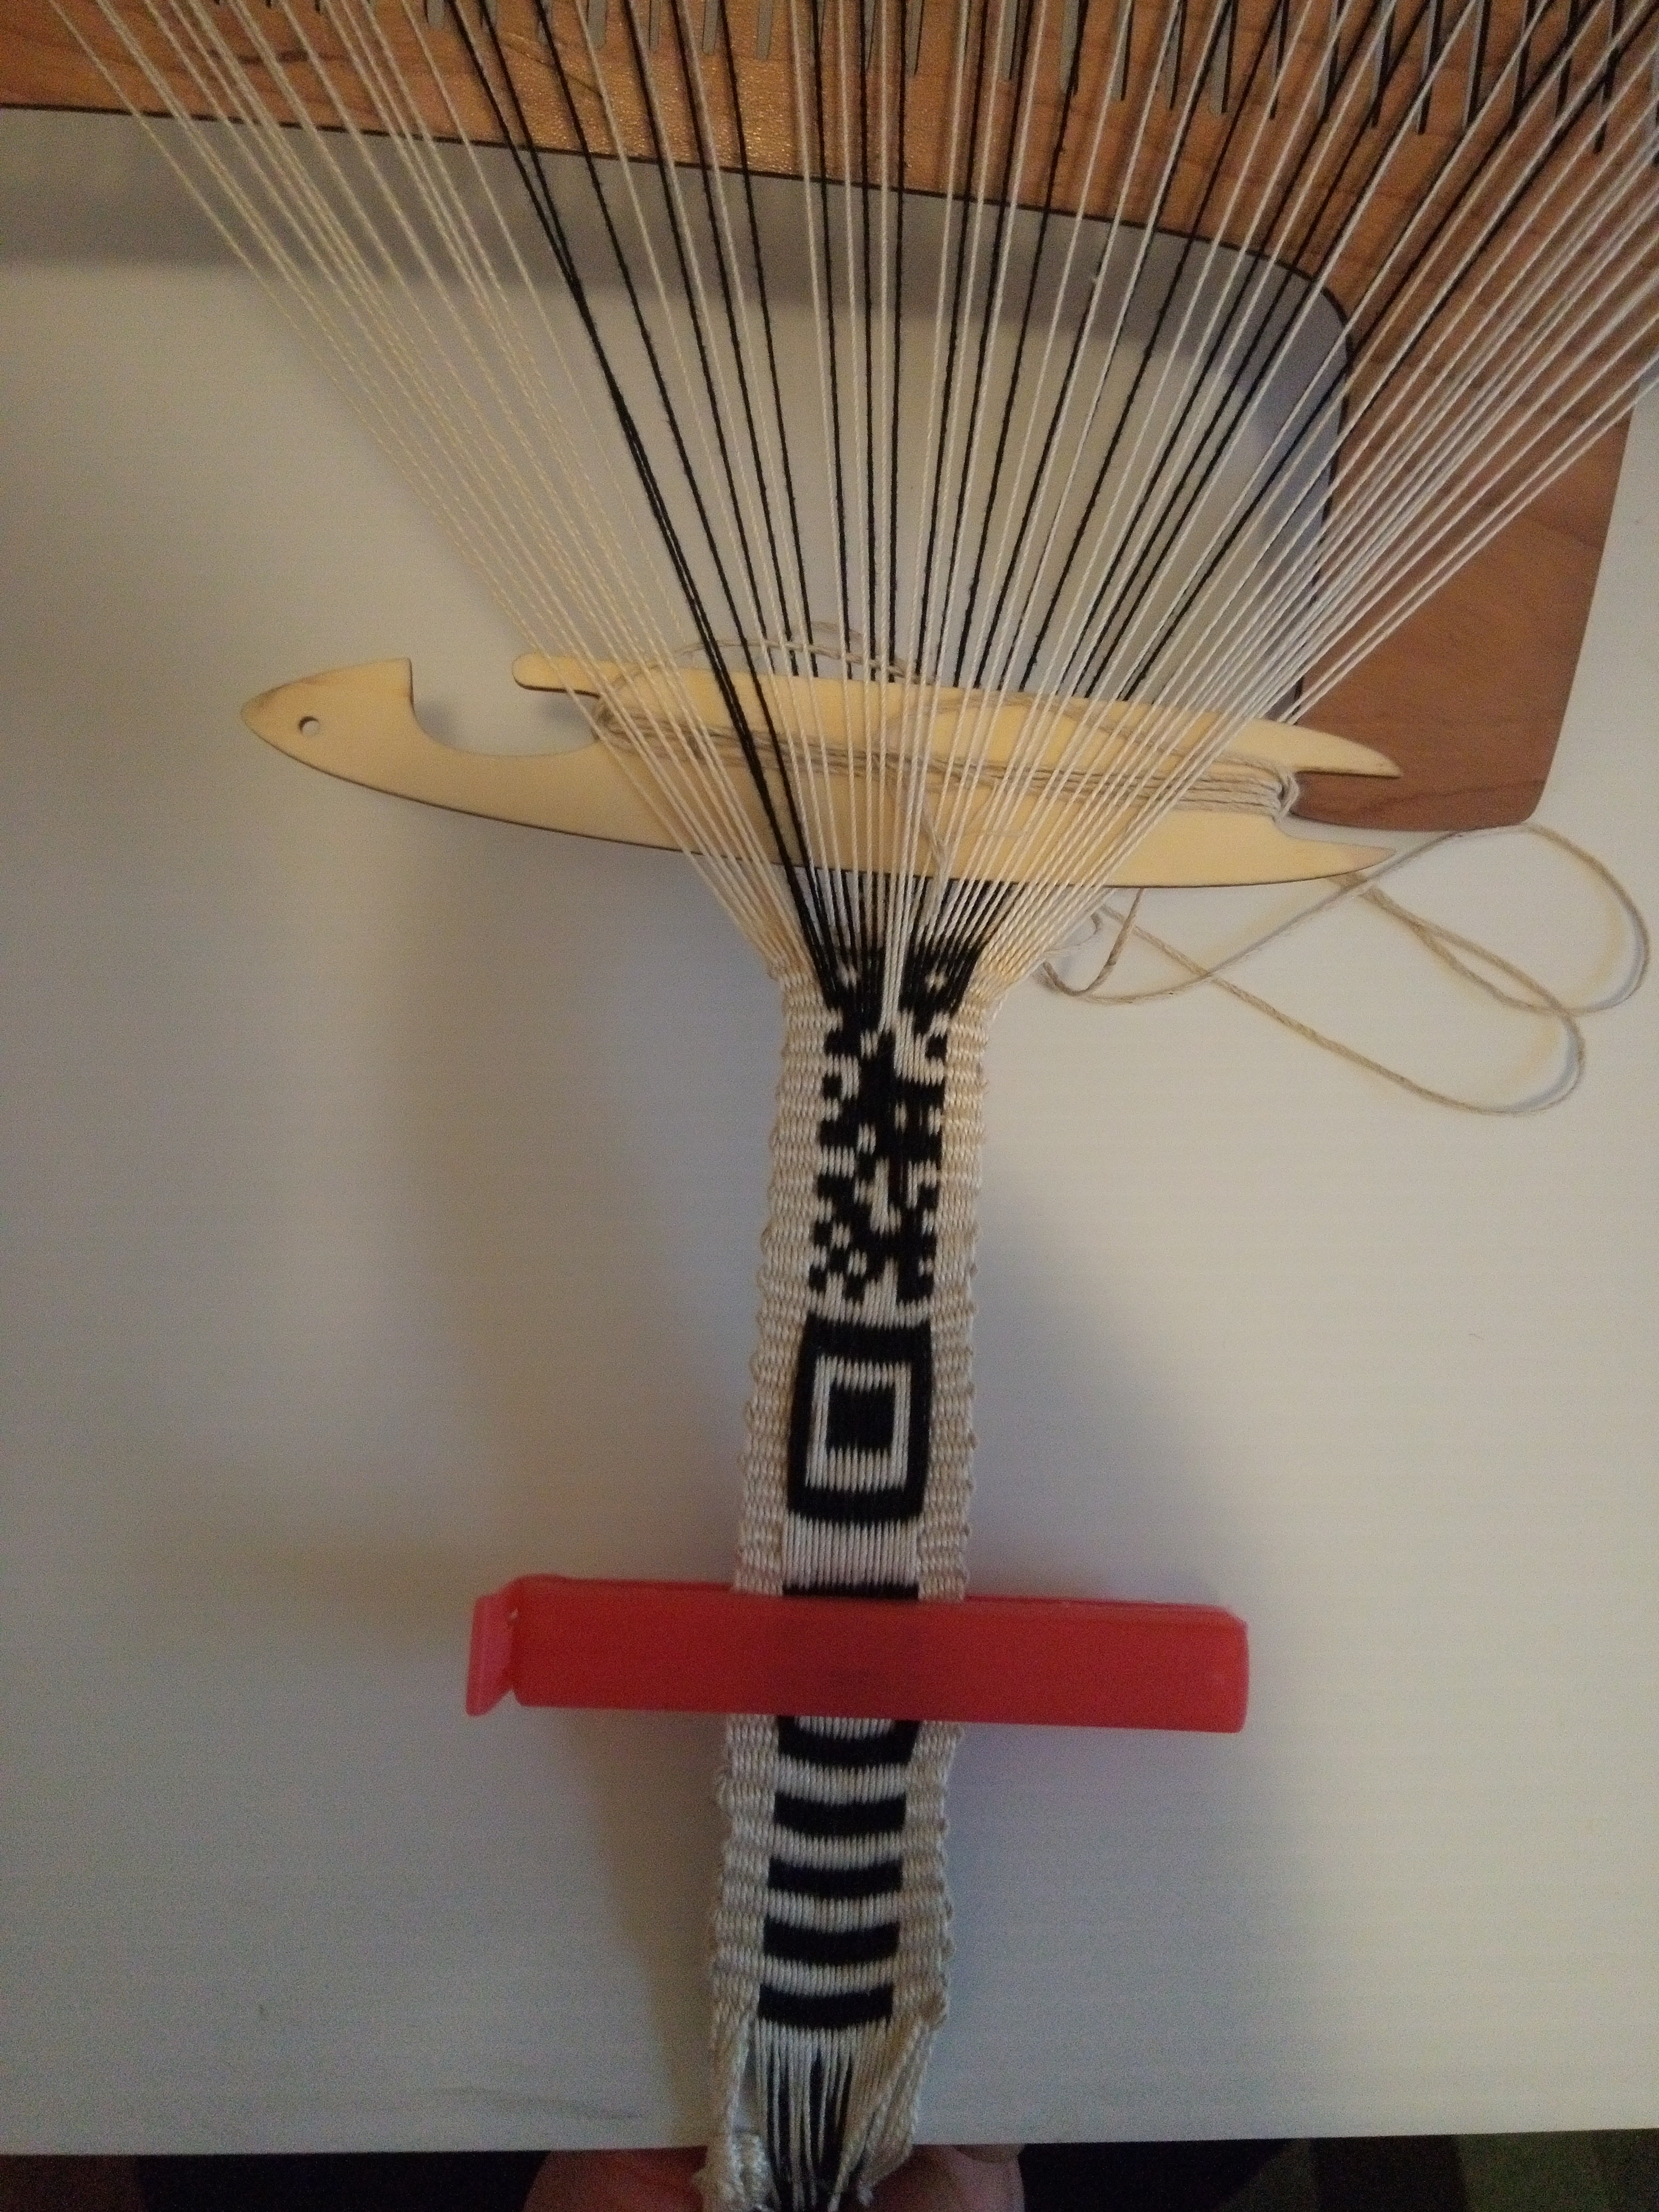
Figure 10: Band #5 on Heddle #2, end of Session #12
Session #11
Session #11 is when work started on Band #5. Session #11 is also the first time weaving with Heddle #2.
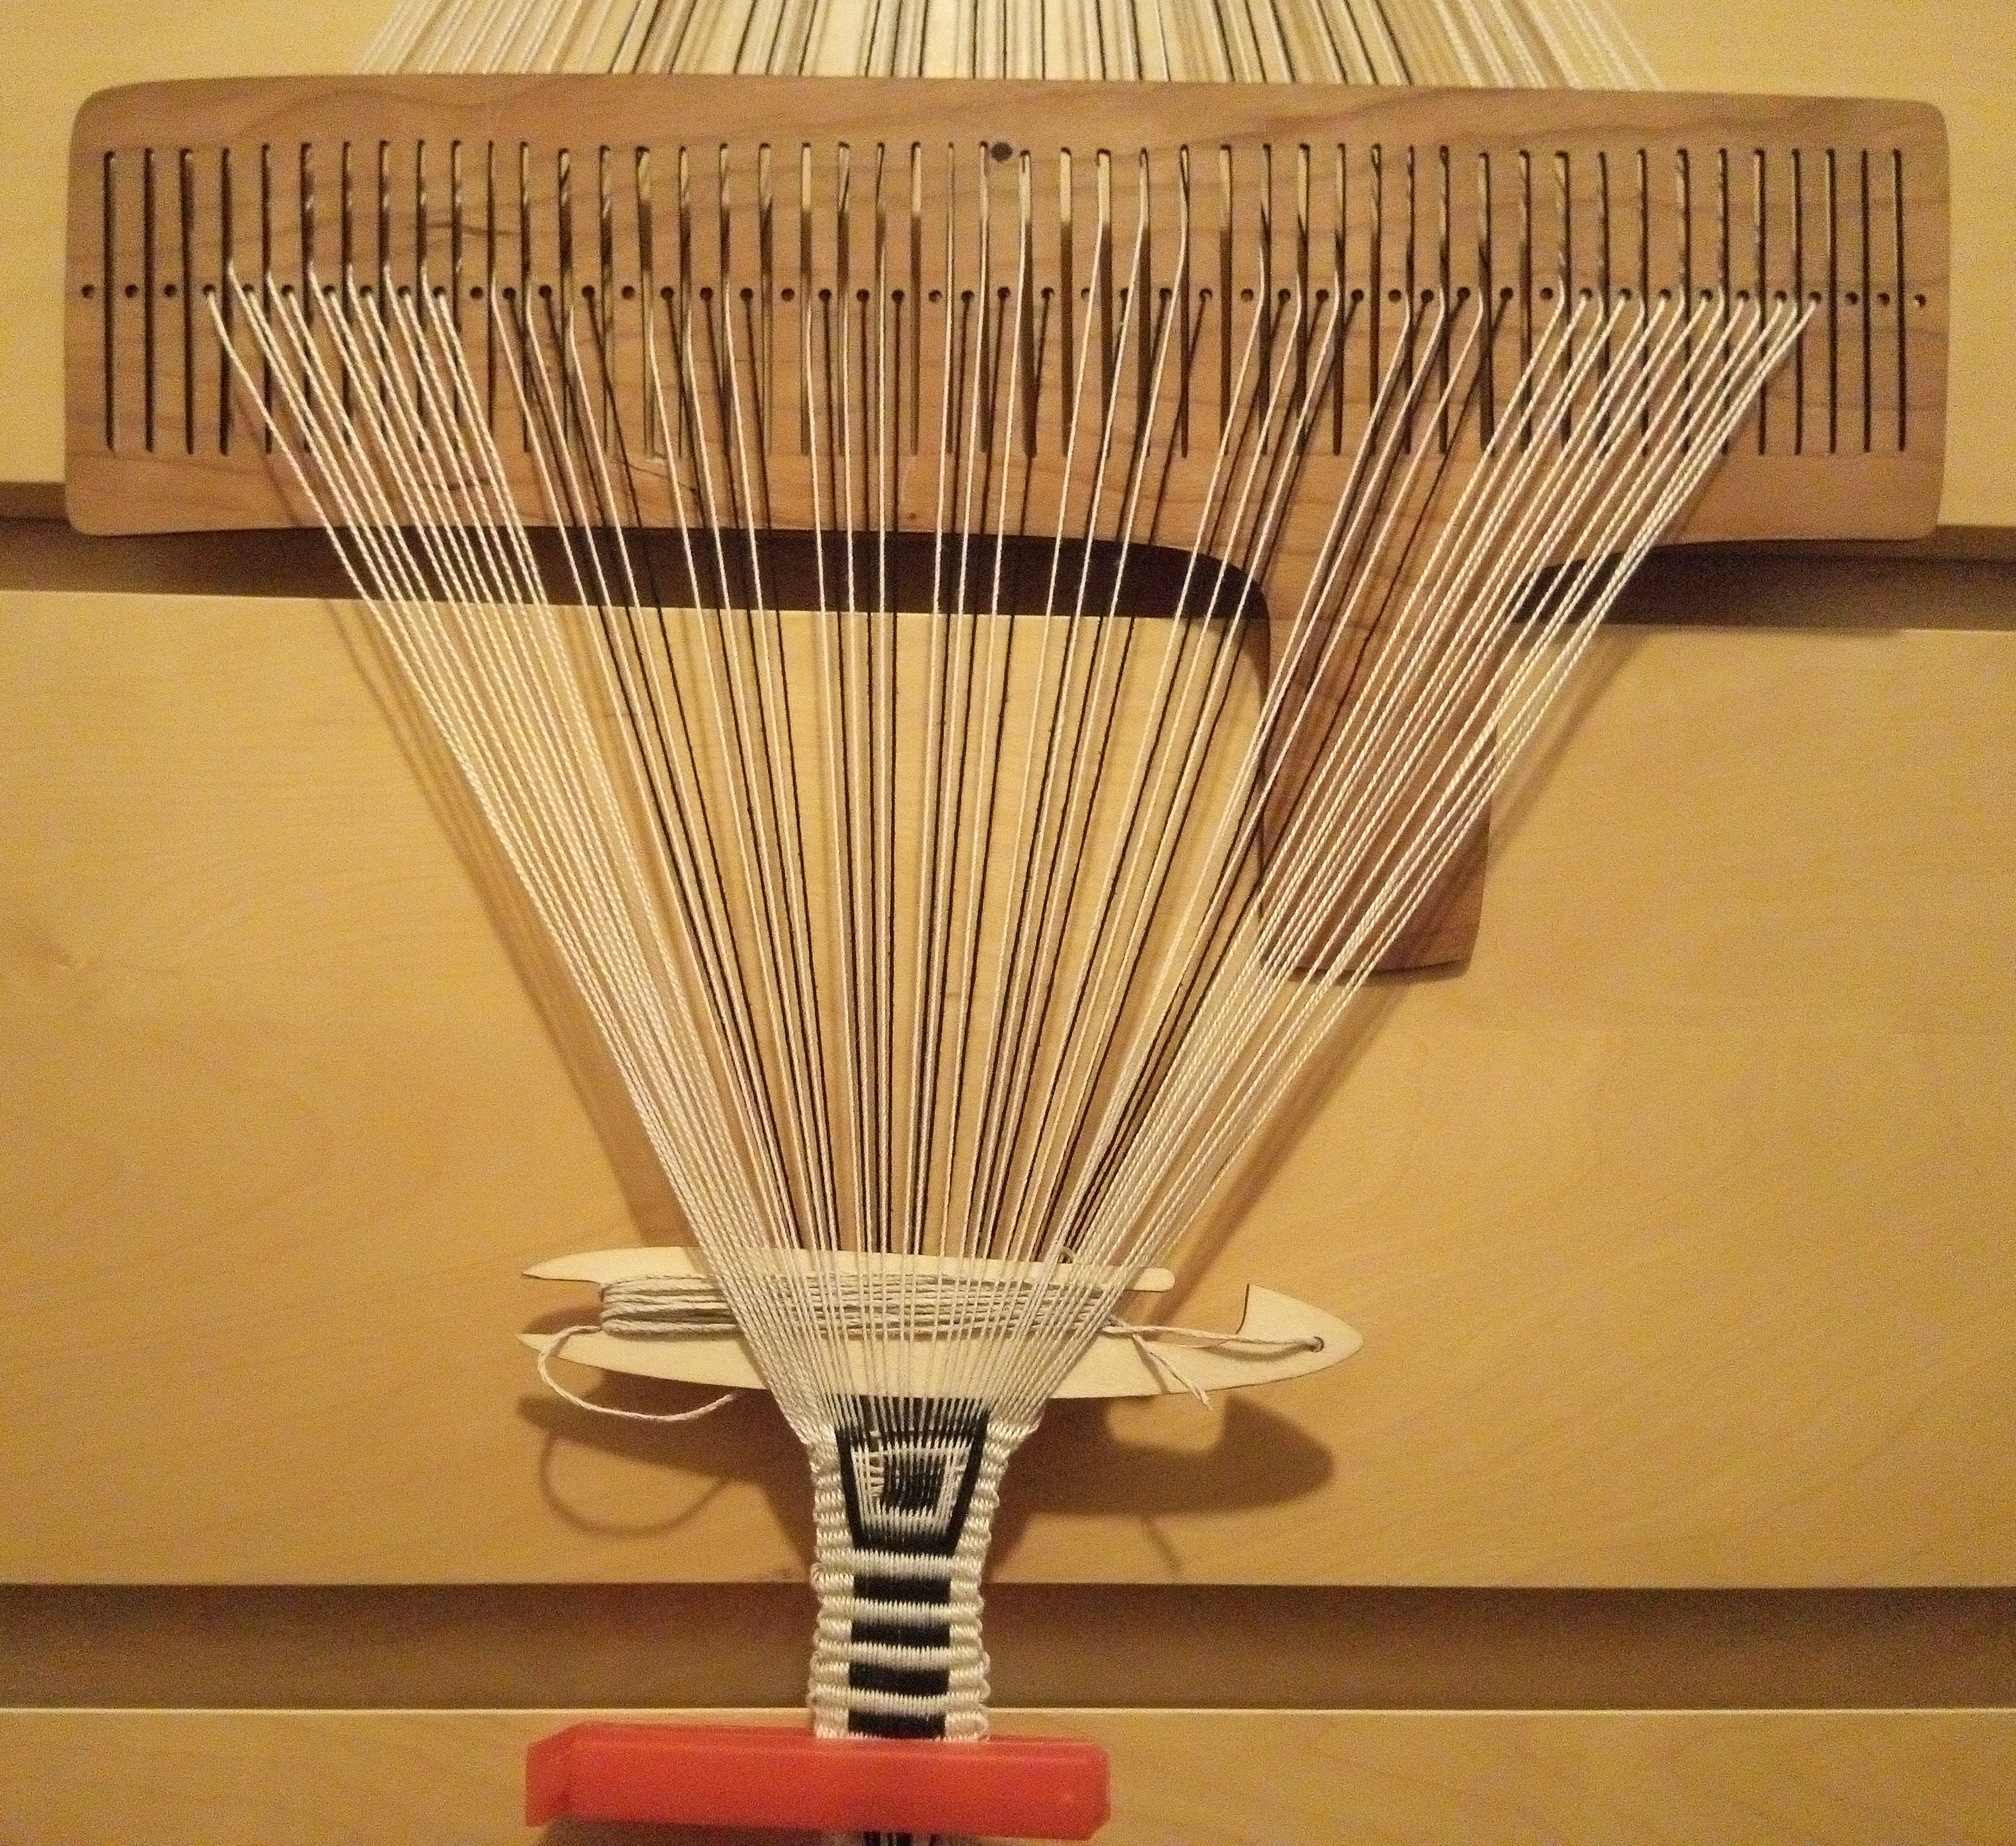
Figure 11: Band #5 on Heddle #2, end of Session #11
Ladder infra-structured bands
There is an interesting coincidence between the physical structure of woven bands and the visual structure of rMQR codes which might be put to good engineering use: they both have structure along the long edges. This coincidence should be explored: perhap best thought of as a physical ladder infra-structure underlying better encoding of a band's rMQR code's visual data structure.
Figure 12: The non-cargo part of an rMQR code
Stronger warp threads on the edges of a rMQR ID band might make for more readable QR codes. Such would be analogous to having strong side rails on a ladder. To visualize such warp patternings, refer to the following band and imagine if each green warp were thicker than the rest:
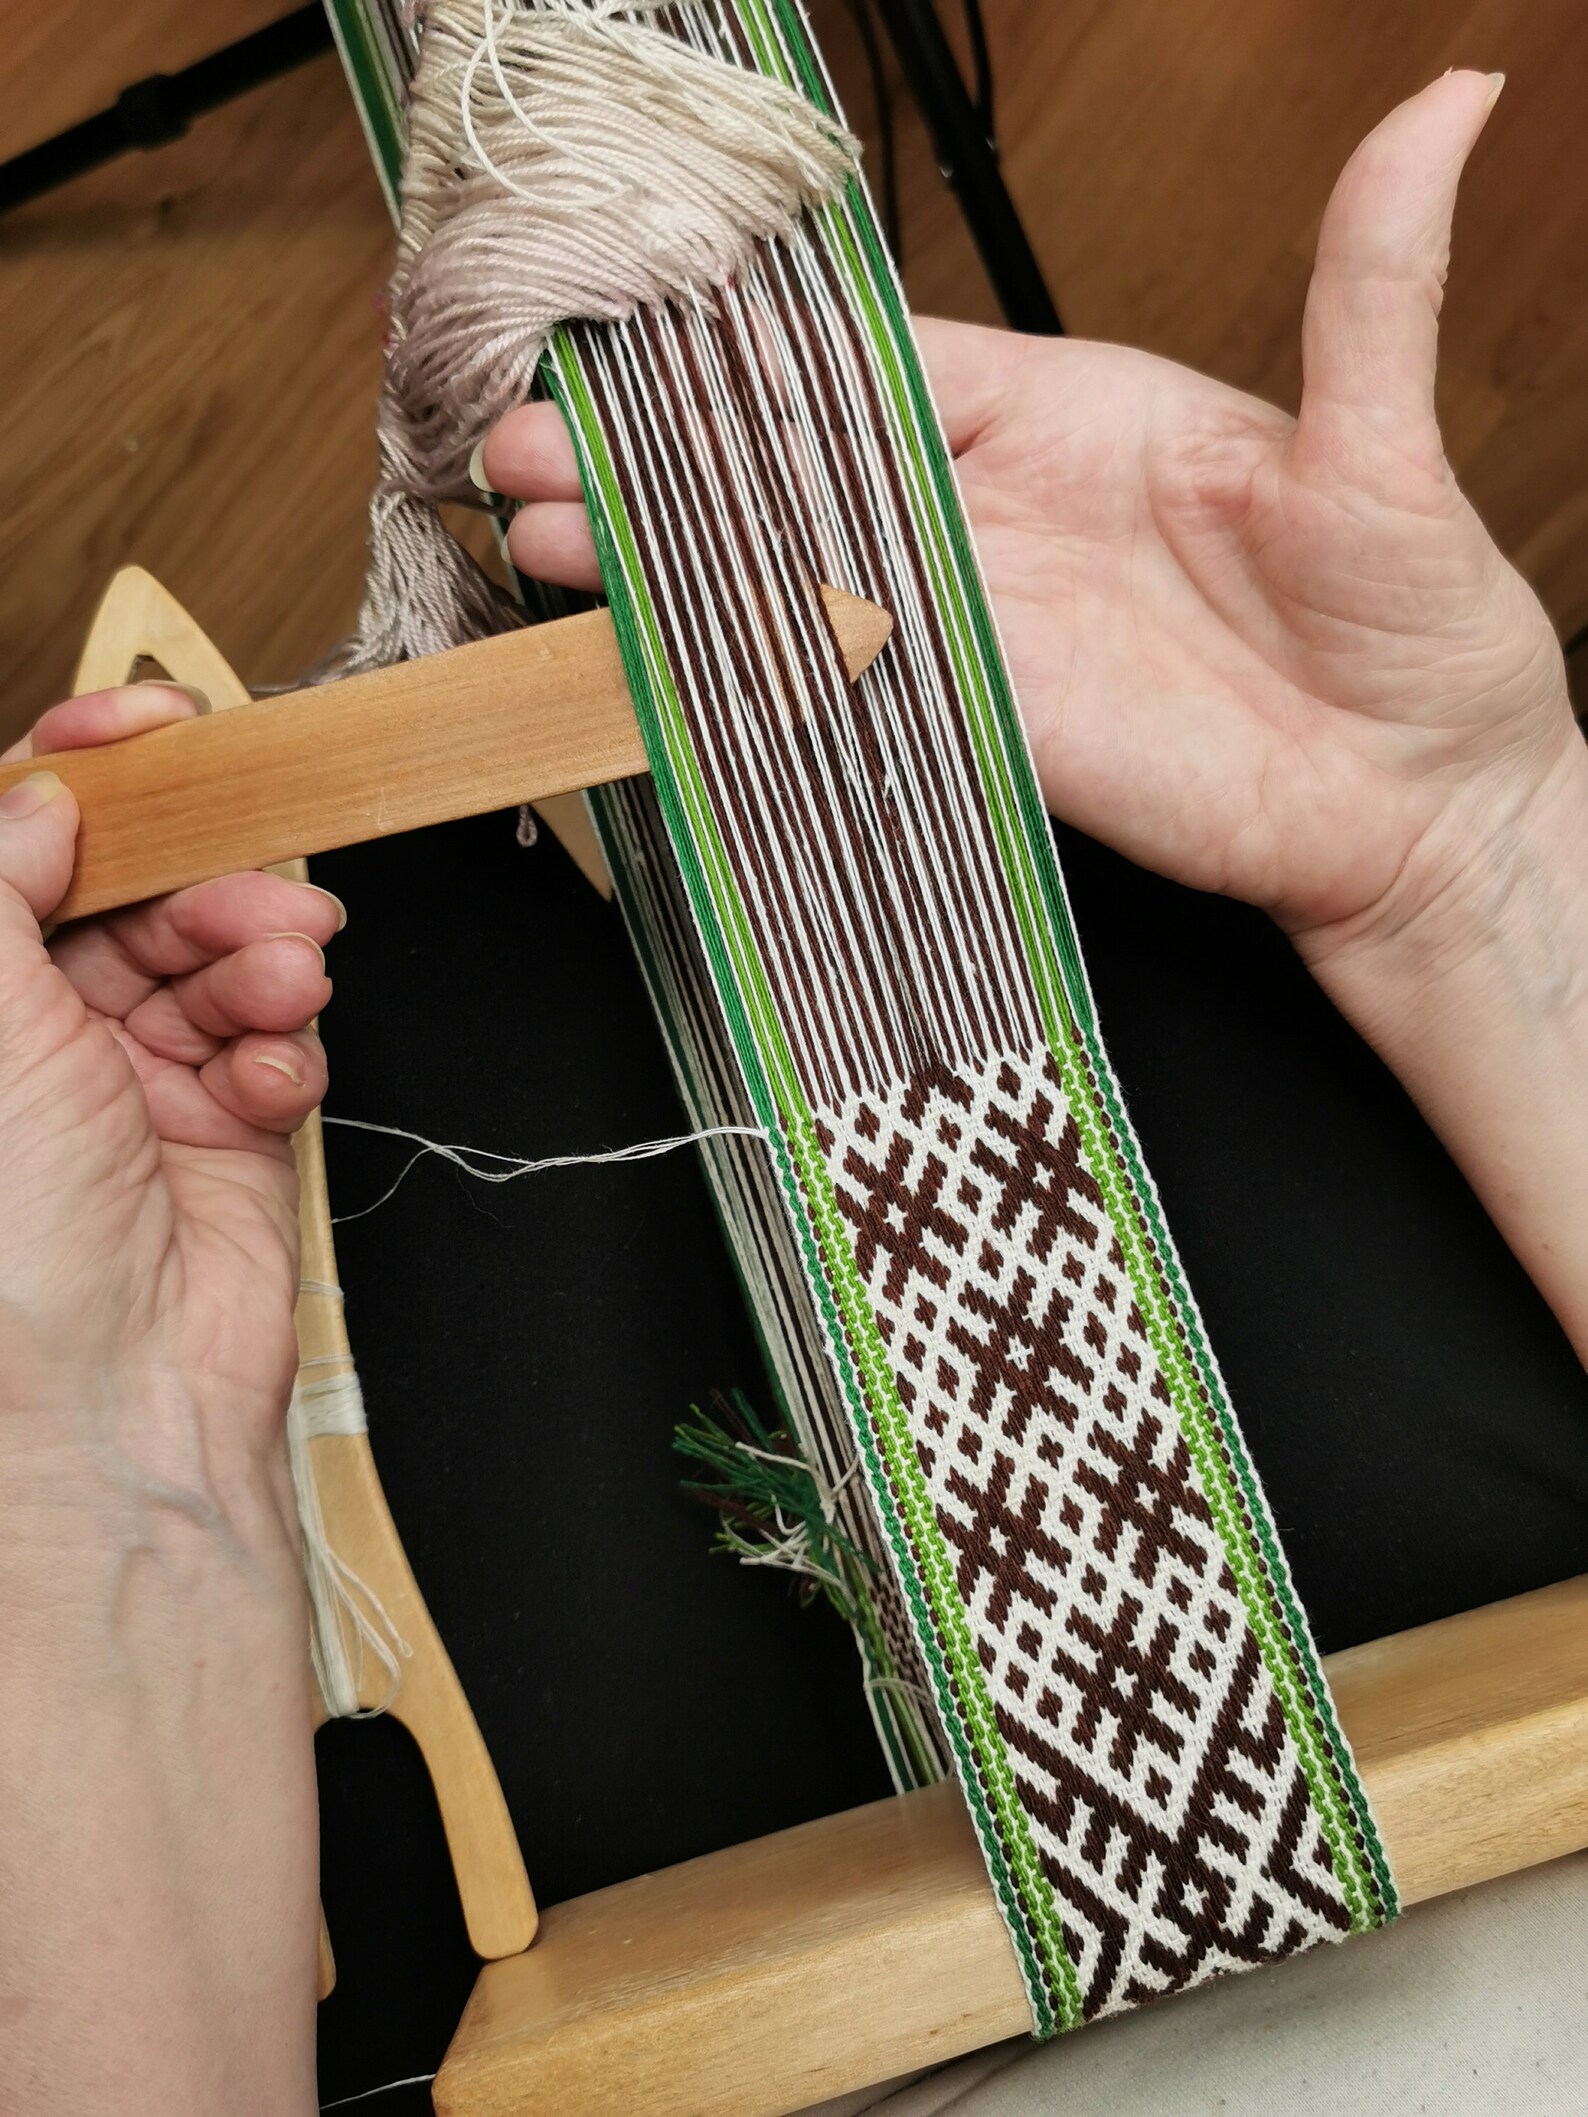
Figure 13: Green warps could be thicker than others
An interesting variation beyond simply using stronger-thicker thread for the quiet zone edge warps, might be to also have stronger-thicker threads in the warps that make up the two outer rows of QR modules (think: wider, stronger side rail of the ladder). Having that part (the timing patterns) rectilinear and evenly spaced would probably increase scanability, because those two always contain the on-off-on-off timing pattern as required by the spec and illustrated above along the top and bottom edges.
Band #5 started
In Session #11, Band #5 was started. Band #5 is an R7-wide rMQR band with each QR module rendered 3 warps wide, using size 10 warp threads.
By definition double faced warp weaving has warp threads that come in pairs, of which one of the pair will always be on the opposite side of the band as its pair partner (this fact is why double faced bands always have the same pattern on both faces, one the inverse of the other).
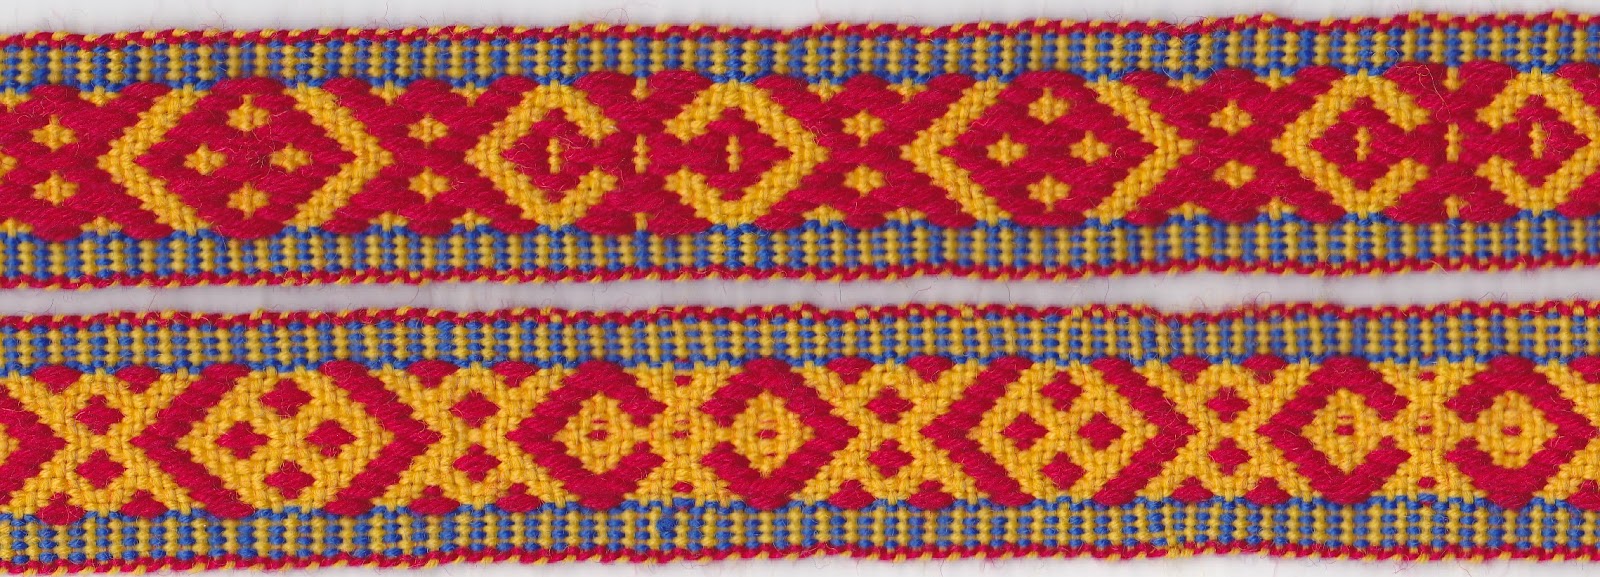
Figure 14: The two opposite faces of a band
As Band #5 uses a double faced warp weave, "modules rendered 3 warps wide" requires 6 warps per QR module. Within a given QR module, all 3 warp pairs will show the same color on a face, thereby making a single module.
Since rMQR bands are monochromatic by design, each warp pair will have 1 dark and 1 light thread, in other words 3 black and 3 white per each QR module, a six adjacent to each other.
Six adjacent warp ends (3 blacks and 3 whites) per QR module would require a heddle with at least 66 dents in order to weave an R7-wide rMQR. An R7-wide rMQR code actually require 11 not 7 module of band width: the core 7 modules wide code + 2 quiet zone margins each 2 modules wide = a band 11 modules wide. 11 modules X 6 threads/module = 66 threads.
As such, the warping plan for Band #5 is symetrical left-to-right:
- 13 white, size 5 crochet yarn (DMC pearl cotton ecru)
- 42 warps alternating black and white, all size 10
- 12 white, size 5 crochet yarn
Band #5 is the first experiment involving stronger warp threads in the selvage (the size 5 warps above). The goal hear is to prevent the edges of the band from stretching. So the 12 all white warps on each edge are size 5; these make up the edges of the band which make up the required two QR module wide "quiet zone" around the data encoding part of an rMQR. The warp threads in the middle of the band (where data is actually recorded) are white size 10 and black size 10. The idea is that a large weft thread (1mm) and medium/large warp threads (size 5) creat a sort of ladder struction, and the small (size 10) central warps encode the data more finely, potentially leading to smaller bands.
Heddle #2 with 91 dents, up from a max of 31
As seen in the first ten bandgrinding sessions below Heddle #1, the first rigid heddle used in these bandgrinding experimens, has 33 dents – 17 holes plus 16 slots.
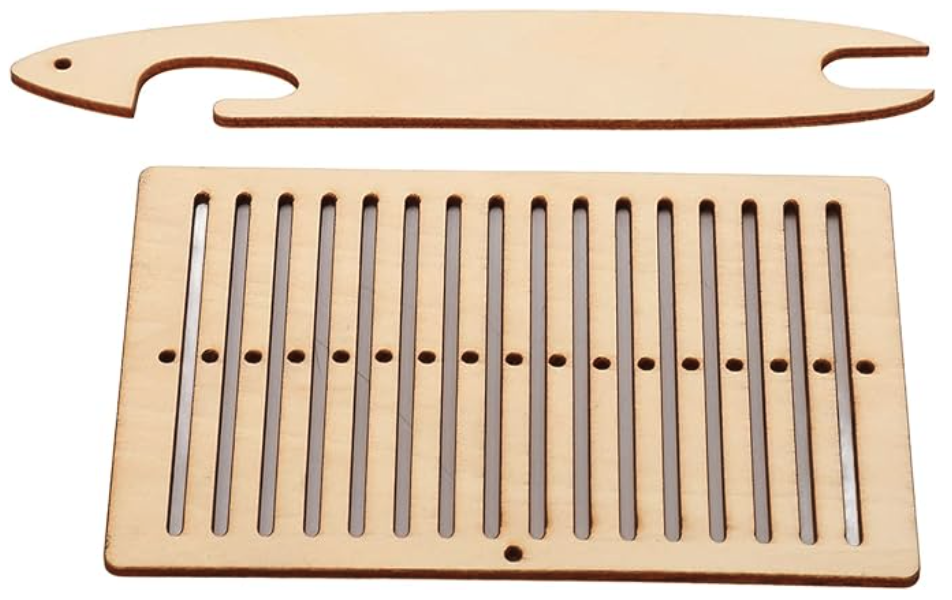
Figure 15: Heddle #1 has 33 dents
The current experimental goal is to get a QR reader to recognize an R7-wide rMQR handwoven onto a band. The earliest experiments used only one warp thread per QR module. Starting in Session #9, experiments started using three warp threads to render each QR module. At that point, Heddle #1 was not large enough to handle 6 threads per QR module (3 warps on each side of the band means 6 warps per QR module). Heddle #1 has 31 dents, and so can render at most a QR code 5 modules wide. The minimum width on rMQR code is 7 modules. 31 < (6*7). So, Heddle #1 is a deadend for modules 3 warp ends wide.
Figure 16: Heddle #2 has 91 dents
So, Heddle #2 was ordered on . Heddle #1 has 33 dents and Heddle #2 has 91 dents. (Not two two previous pictures not to the same scale.) 91 will be enough to even get wasteful of dents (and experiment with novel heddle designs).
Session #10
Session #10 produced the bottom half of Band #4, the band started in Session #9.
Obviously, my inexperience with ever the most basic weaving techniques has been hampering results but I am getting better; the problems have been not just hardware, but software as well :)
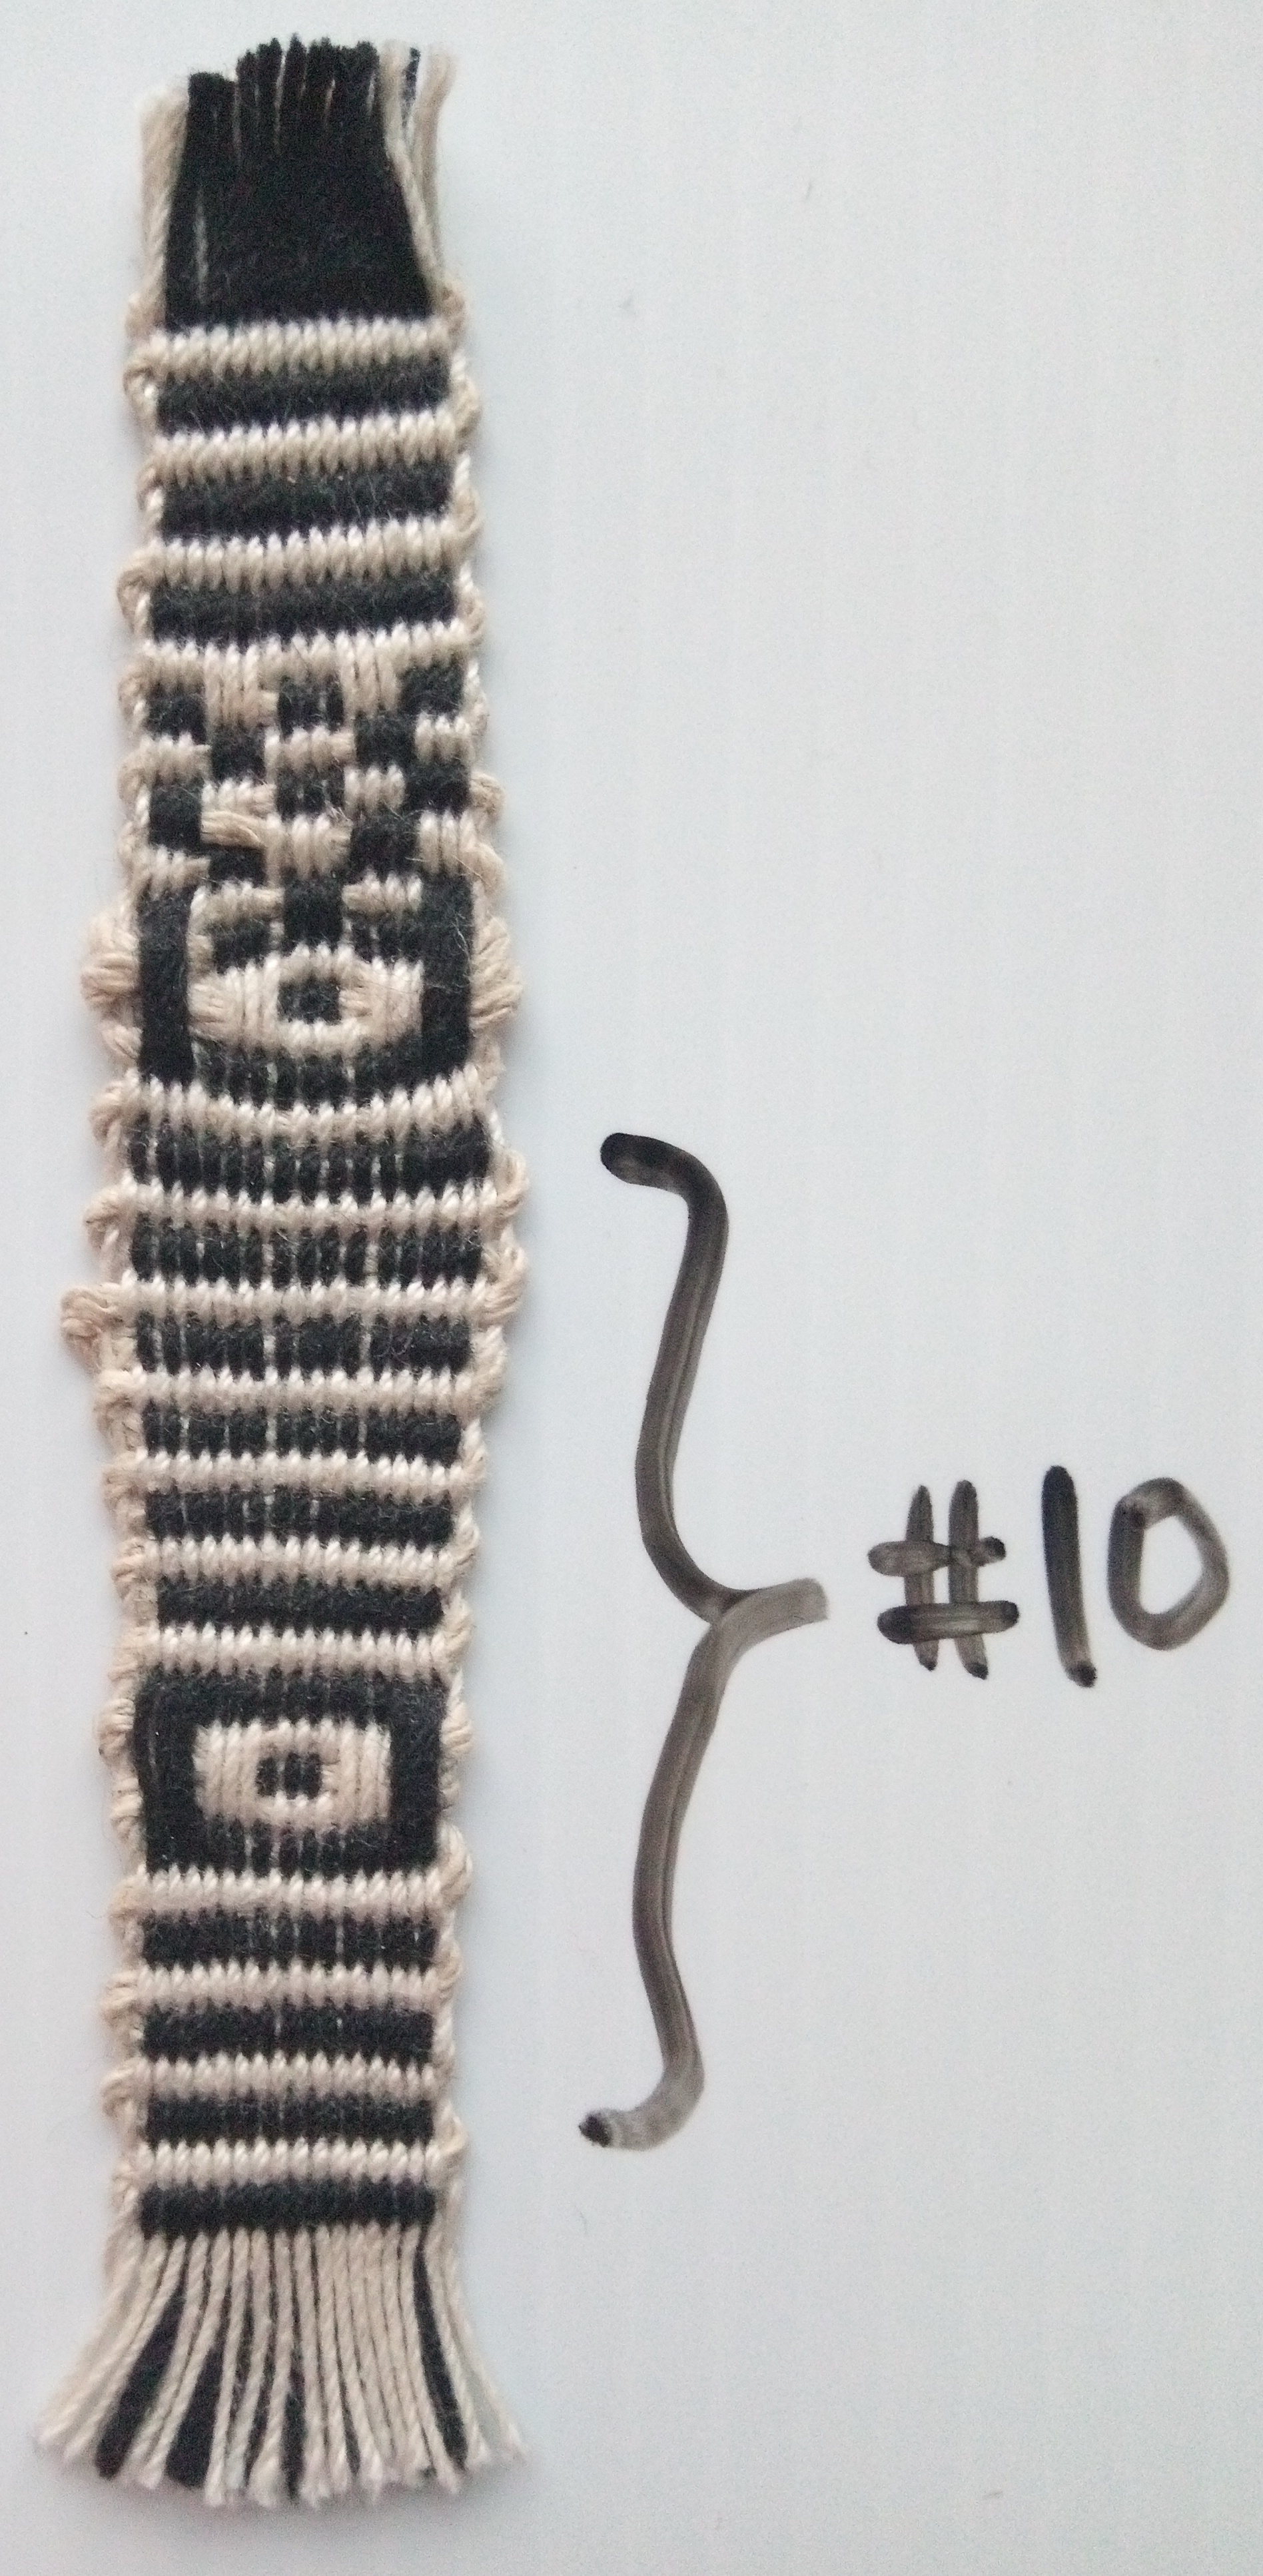
Figure 17: Band #4
- Woven
- A continuation of Band #4, started in Session #9 on Heddle #1 (33 dents)
- Plastic warps clamp added, making tensions individually adjustable
- Much more even tension on warps than Session #9
- Faster weaving, more rectilinear band
- Weft was twirled tigher and waxed (trying to maintain the laid cord's shape)
- Weft: Hemptique 1mm hemp, ecru
- Warp: Size 10 Aunt Lydia's Crochet Thread Classic 10, Ecru 100% mercerized cotton
Session #9
Woven
Session #9 was the first time for the second warping pattern. Previous was using the (double black, white, white, repeat) warping pattern, in both wool (Band #1) and cotton (Bands #2 and #3), which actually was a mistake (that warping pattern might work with other heddles besides Heddle #1; it's a warping pattern used with double holed and other heddle designs but seemed to fail with Heddle #1).
Starting with #9, the warp pattern was changed to (black, white, repeat) both black and white being cotton size 10. The weft stayed at 1mm hemp because no cotton threads on hand thicker than size 10 (hemps nice but an all cotton solution would be easier to source).
This warping pattern is that of "complimentary warp pick-up" weaving. This warping pattern naturally does not expose the weft, except for a smidge at the edges when the weft does a 180. This also means that there are no "gaps" that show the weft, as so the threads stay in place more, making for clearer QR modules.
Session #9 was also the first time that QR modules were woven with three warps ends, rather than a single warp end. As such, the first heddle (17 holes, 16 slots) was not wide enough to render a band 7 QR modules wide. That is why the "QR code" of Session #9 is only 5 modules wide. This smaller square is known as the "finder sub pattern" which ends an rMQR:
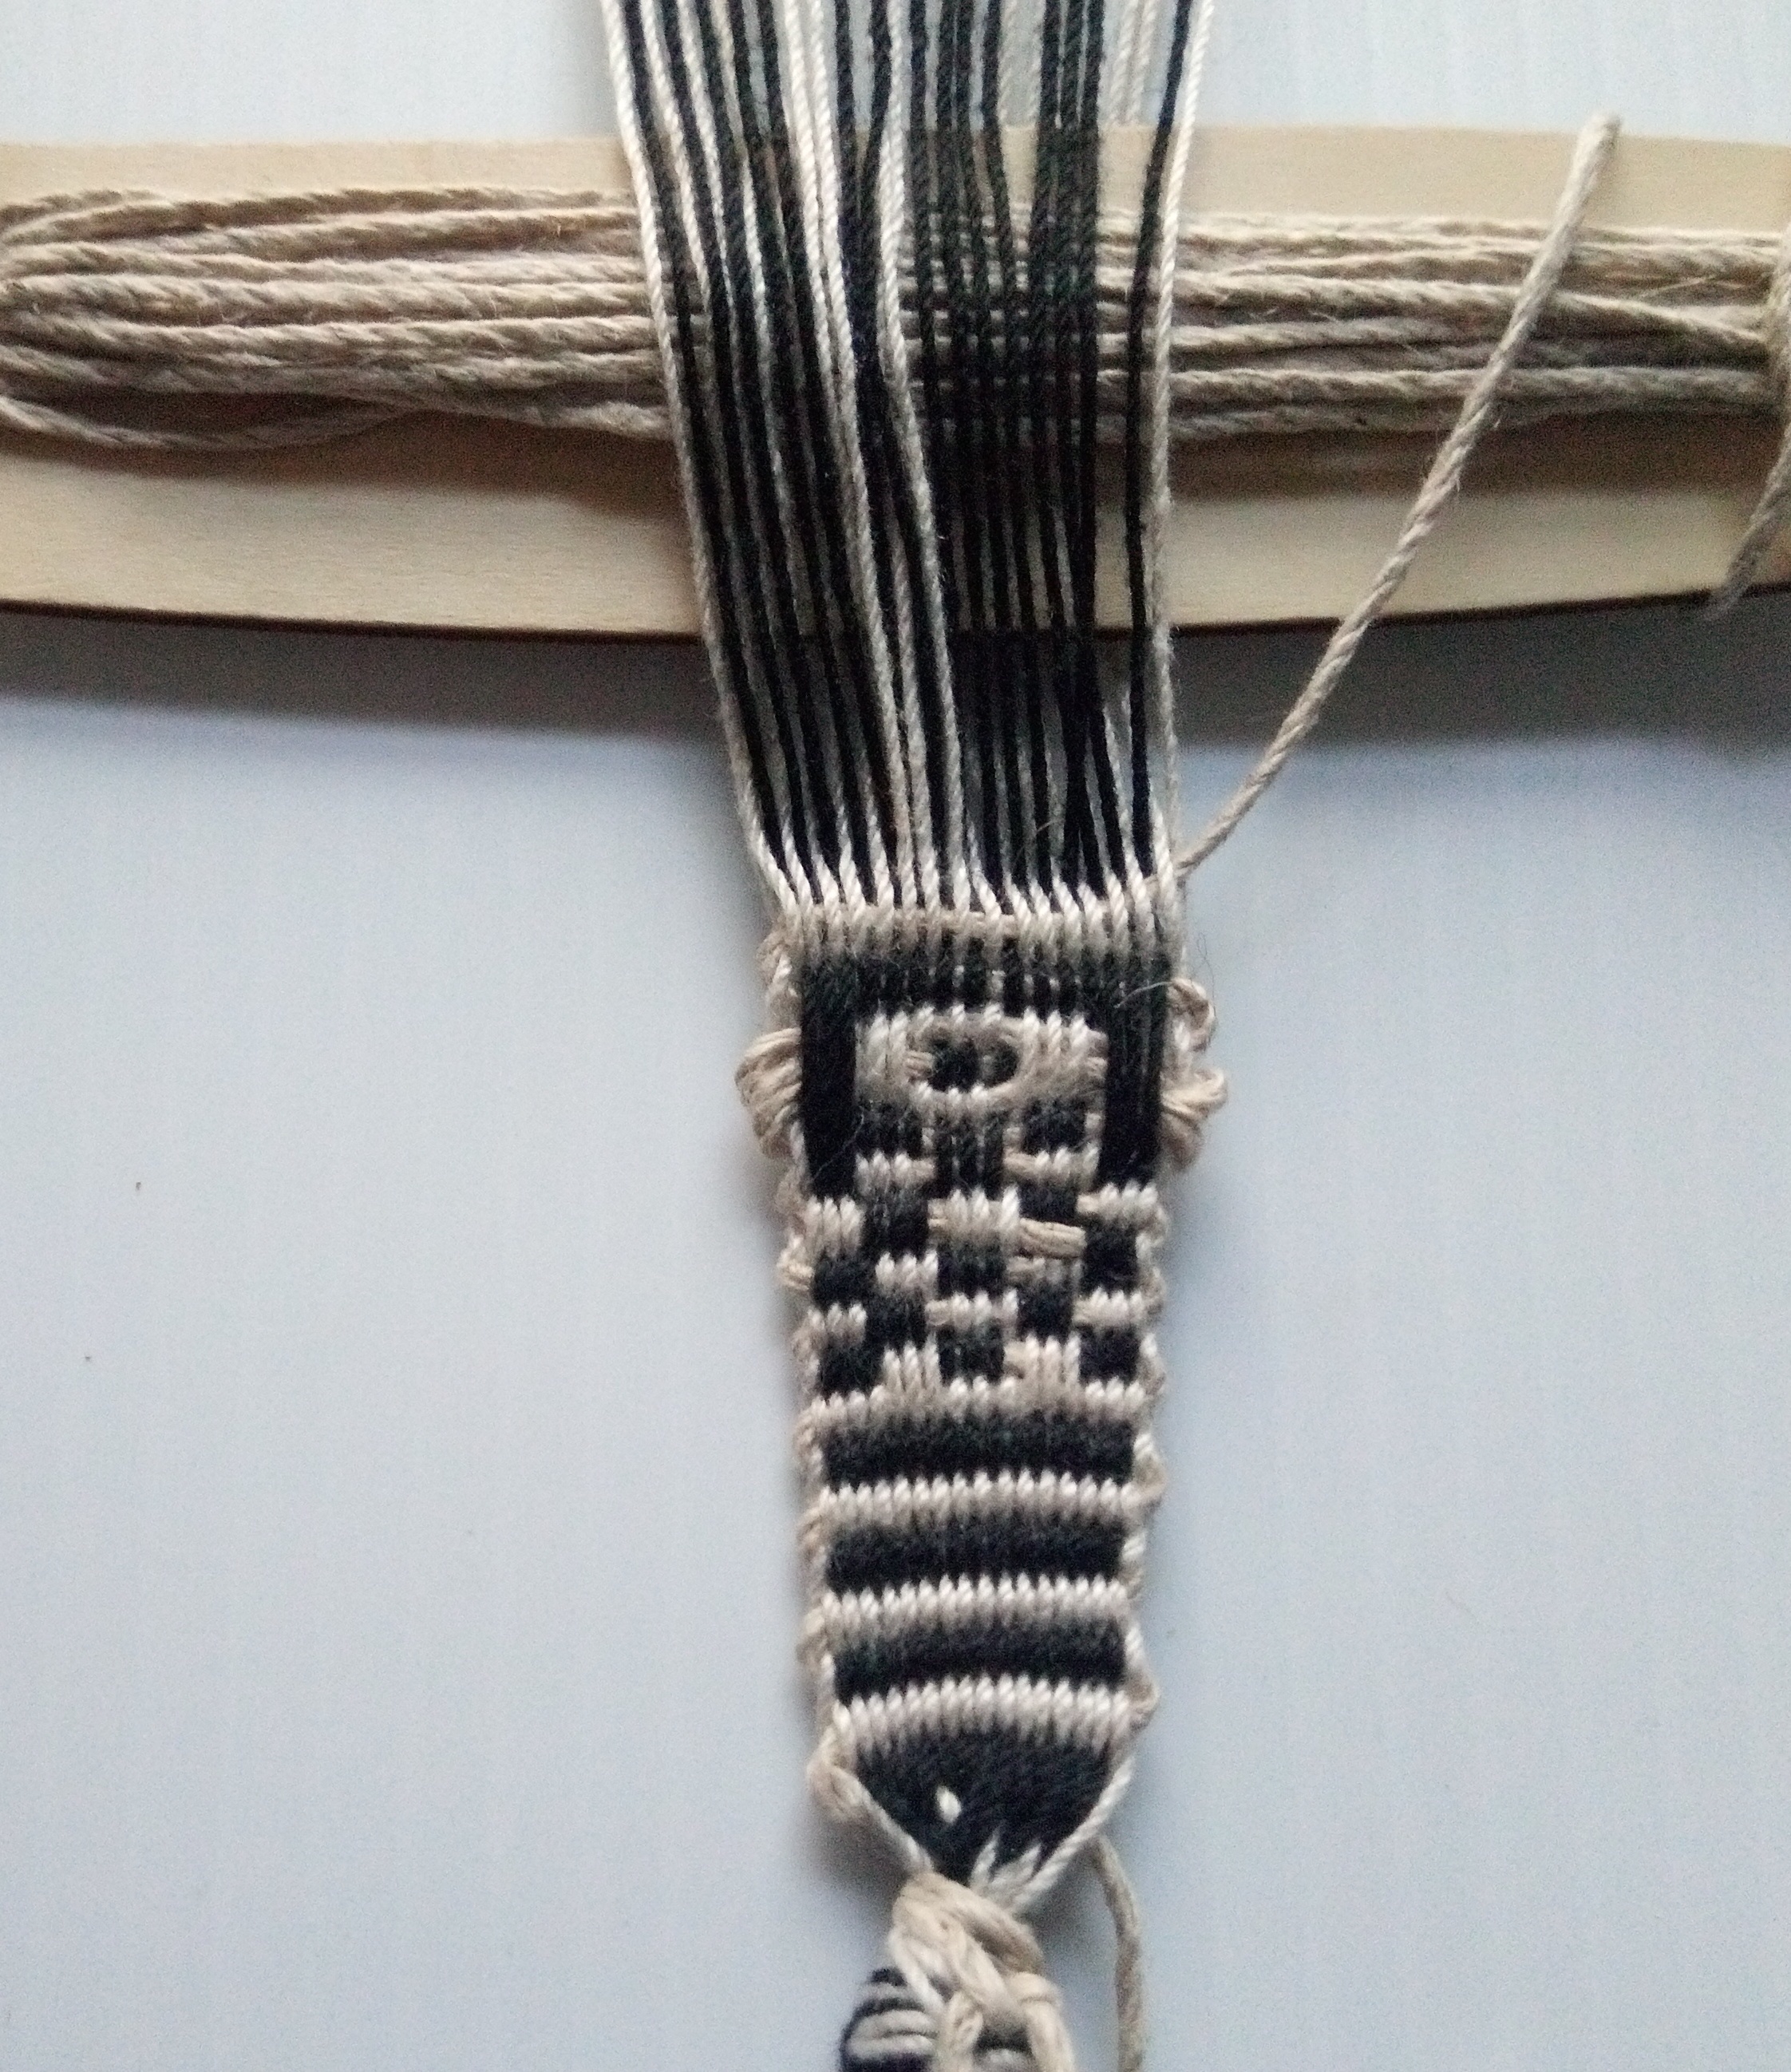
Figure 18: Bandgrind Session #9
There are a few errors in the above weave :(
Session #8
By Session #8, the basics of what theads to work with had been solved well enough. Since Session #1 though #8, the same warping pattern was used (double black, white, white, repeat) as taken from Baltic band weaving technique for pattern weaving. That warping pattern naturally exposes parts of the weft, which in the end is simply a design deadend, which ended right here:
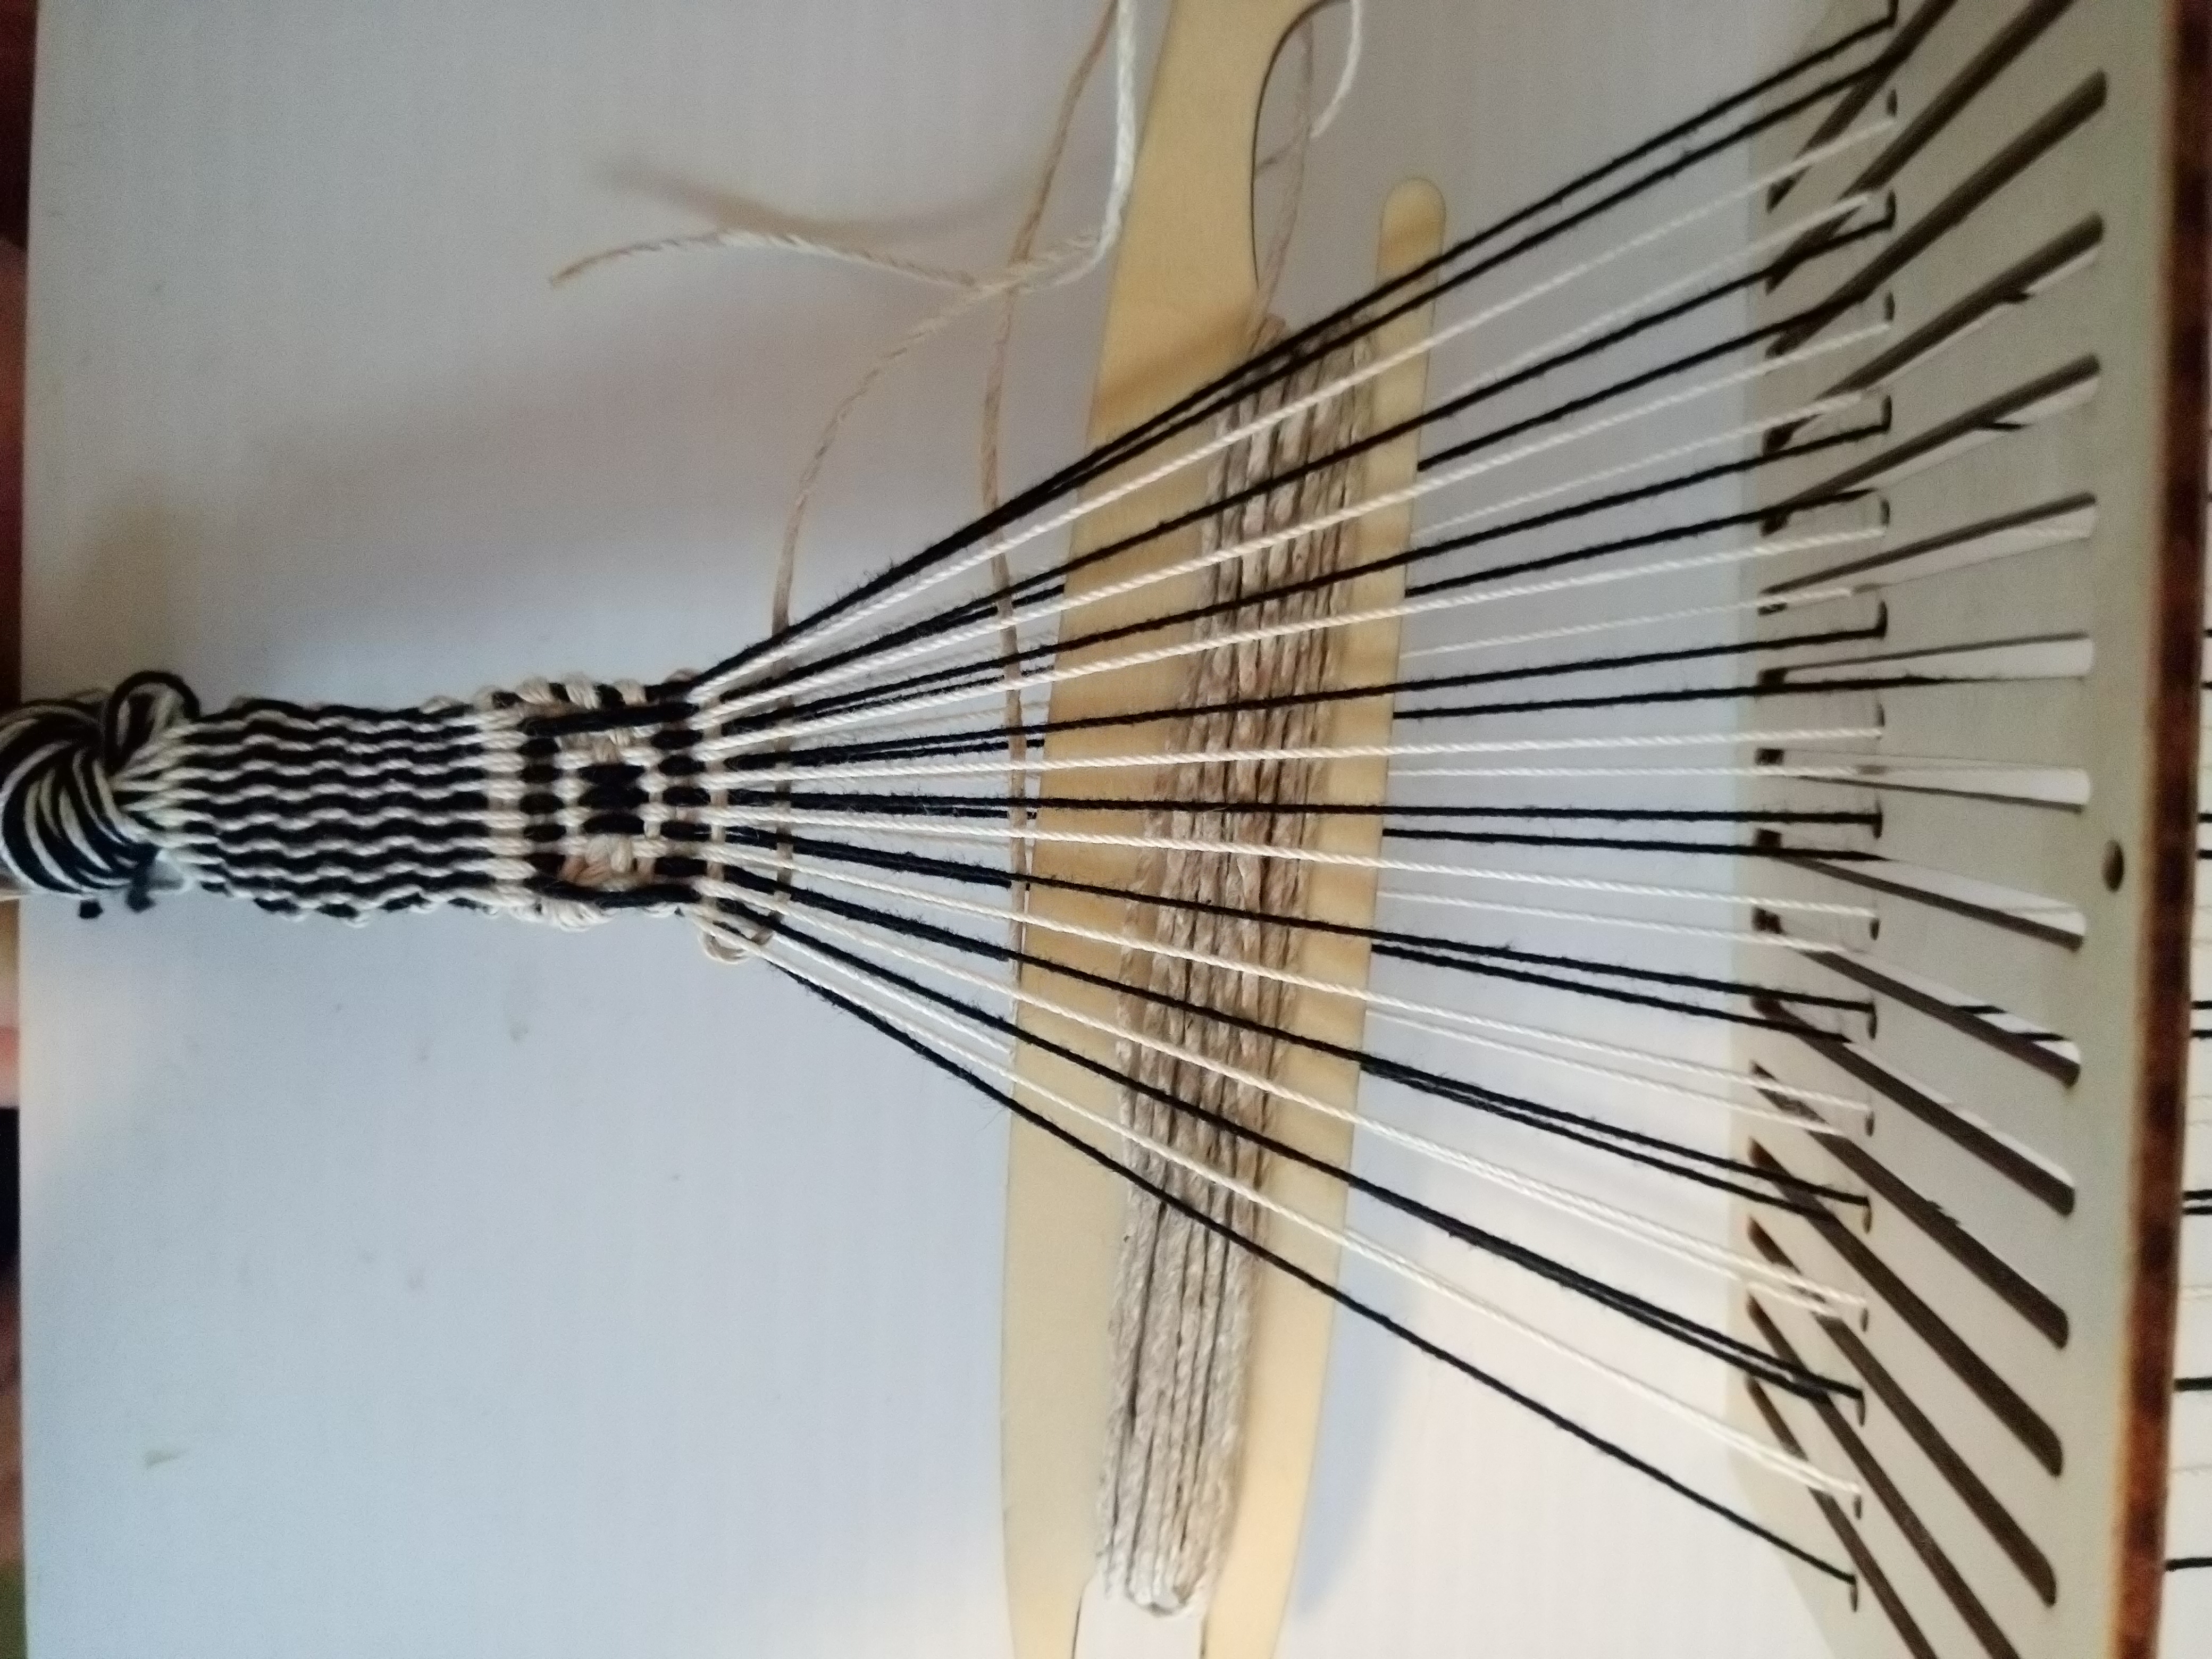
Figure 19: Bandgrind Session #8
Session #7
Session #6 was using multiple size 10 threads to make a thick warp. In Session #7 (between the two squares below) the warp was changed to 1mm thick natural color hemp from Hemptique.
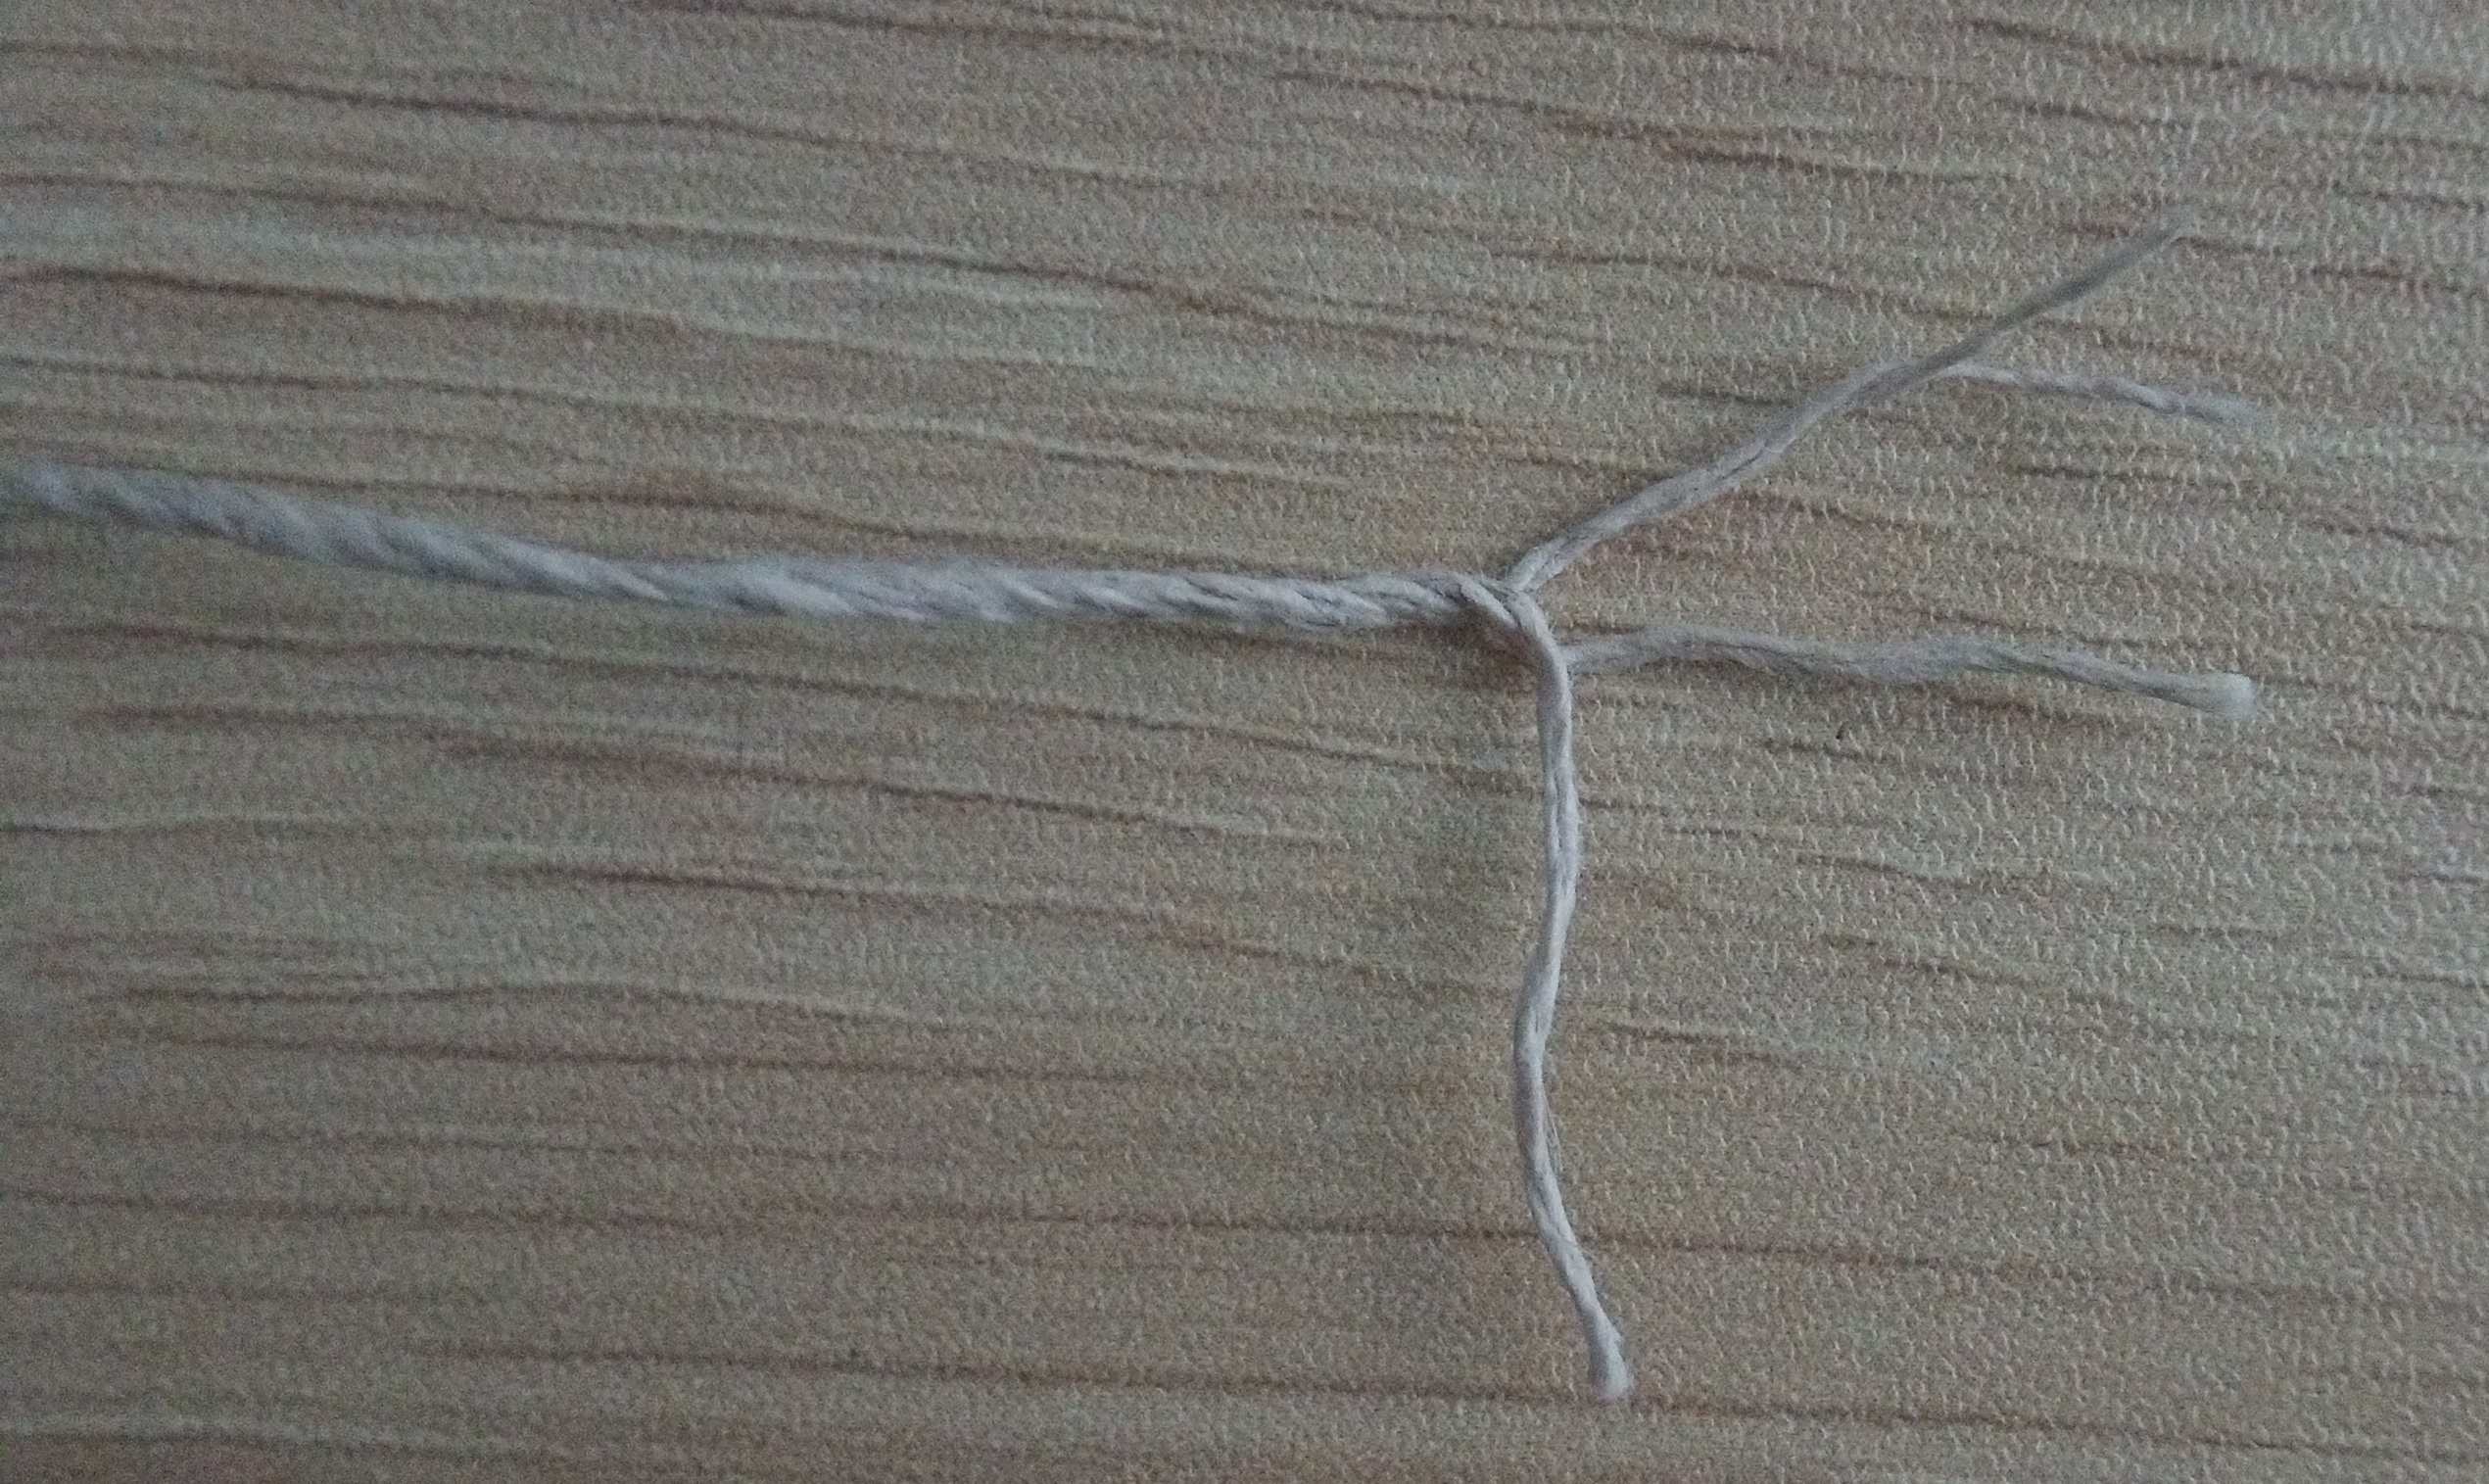
Figure 20: Structure of Hemptique 1mm
(The hemp aspect is just an experiment. Would be nice to have an all cotton solution. Hemp would be more difficult to source in remote parts of the world.)
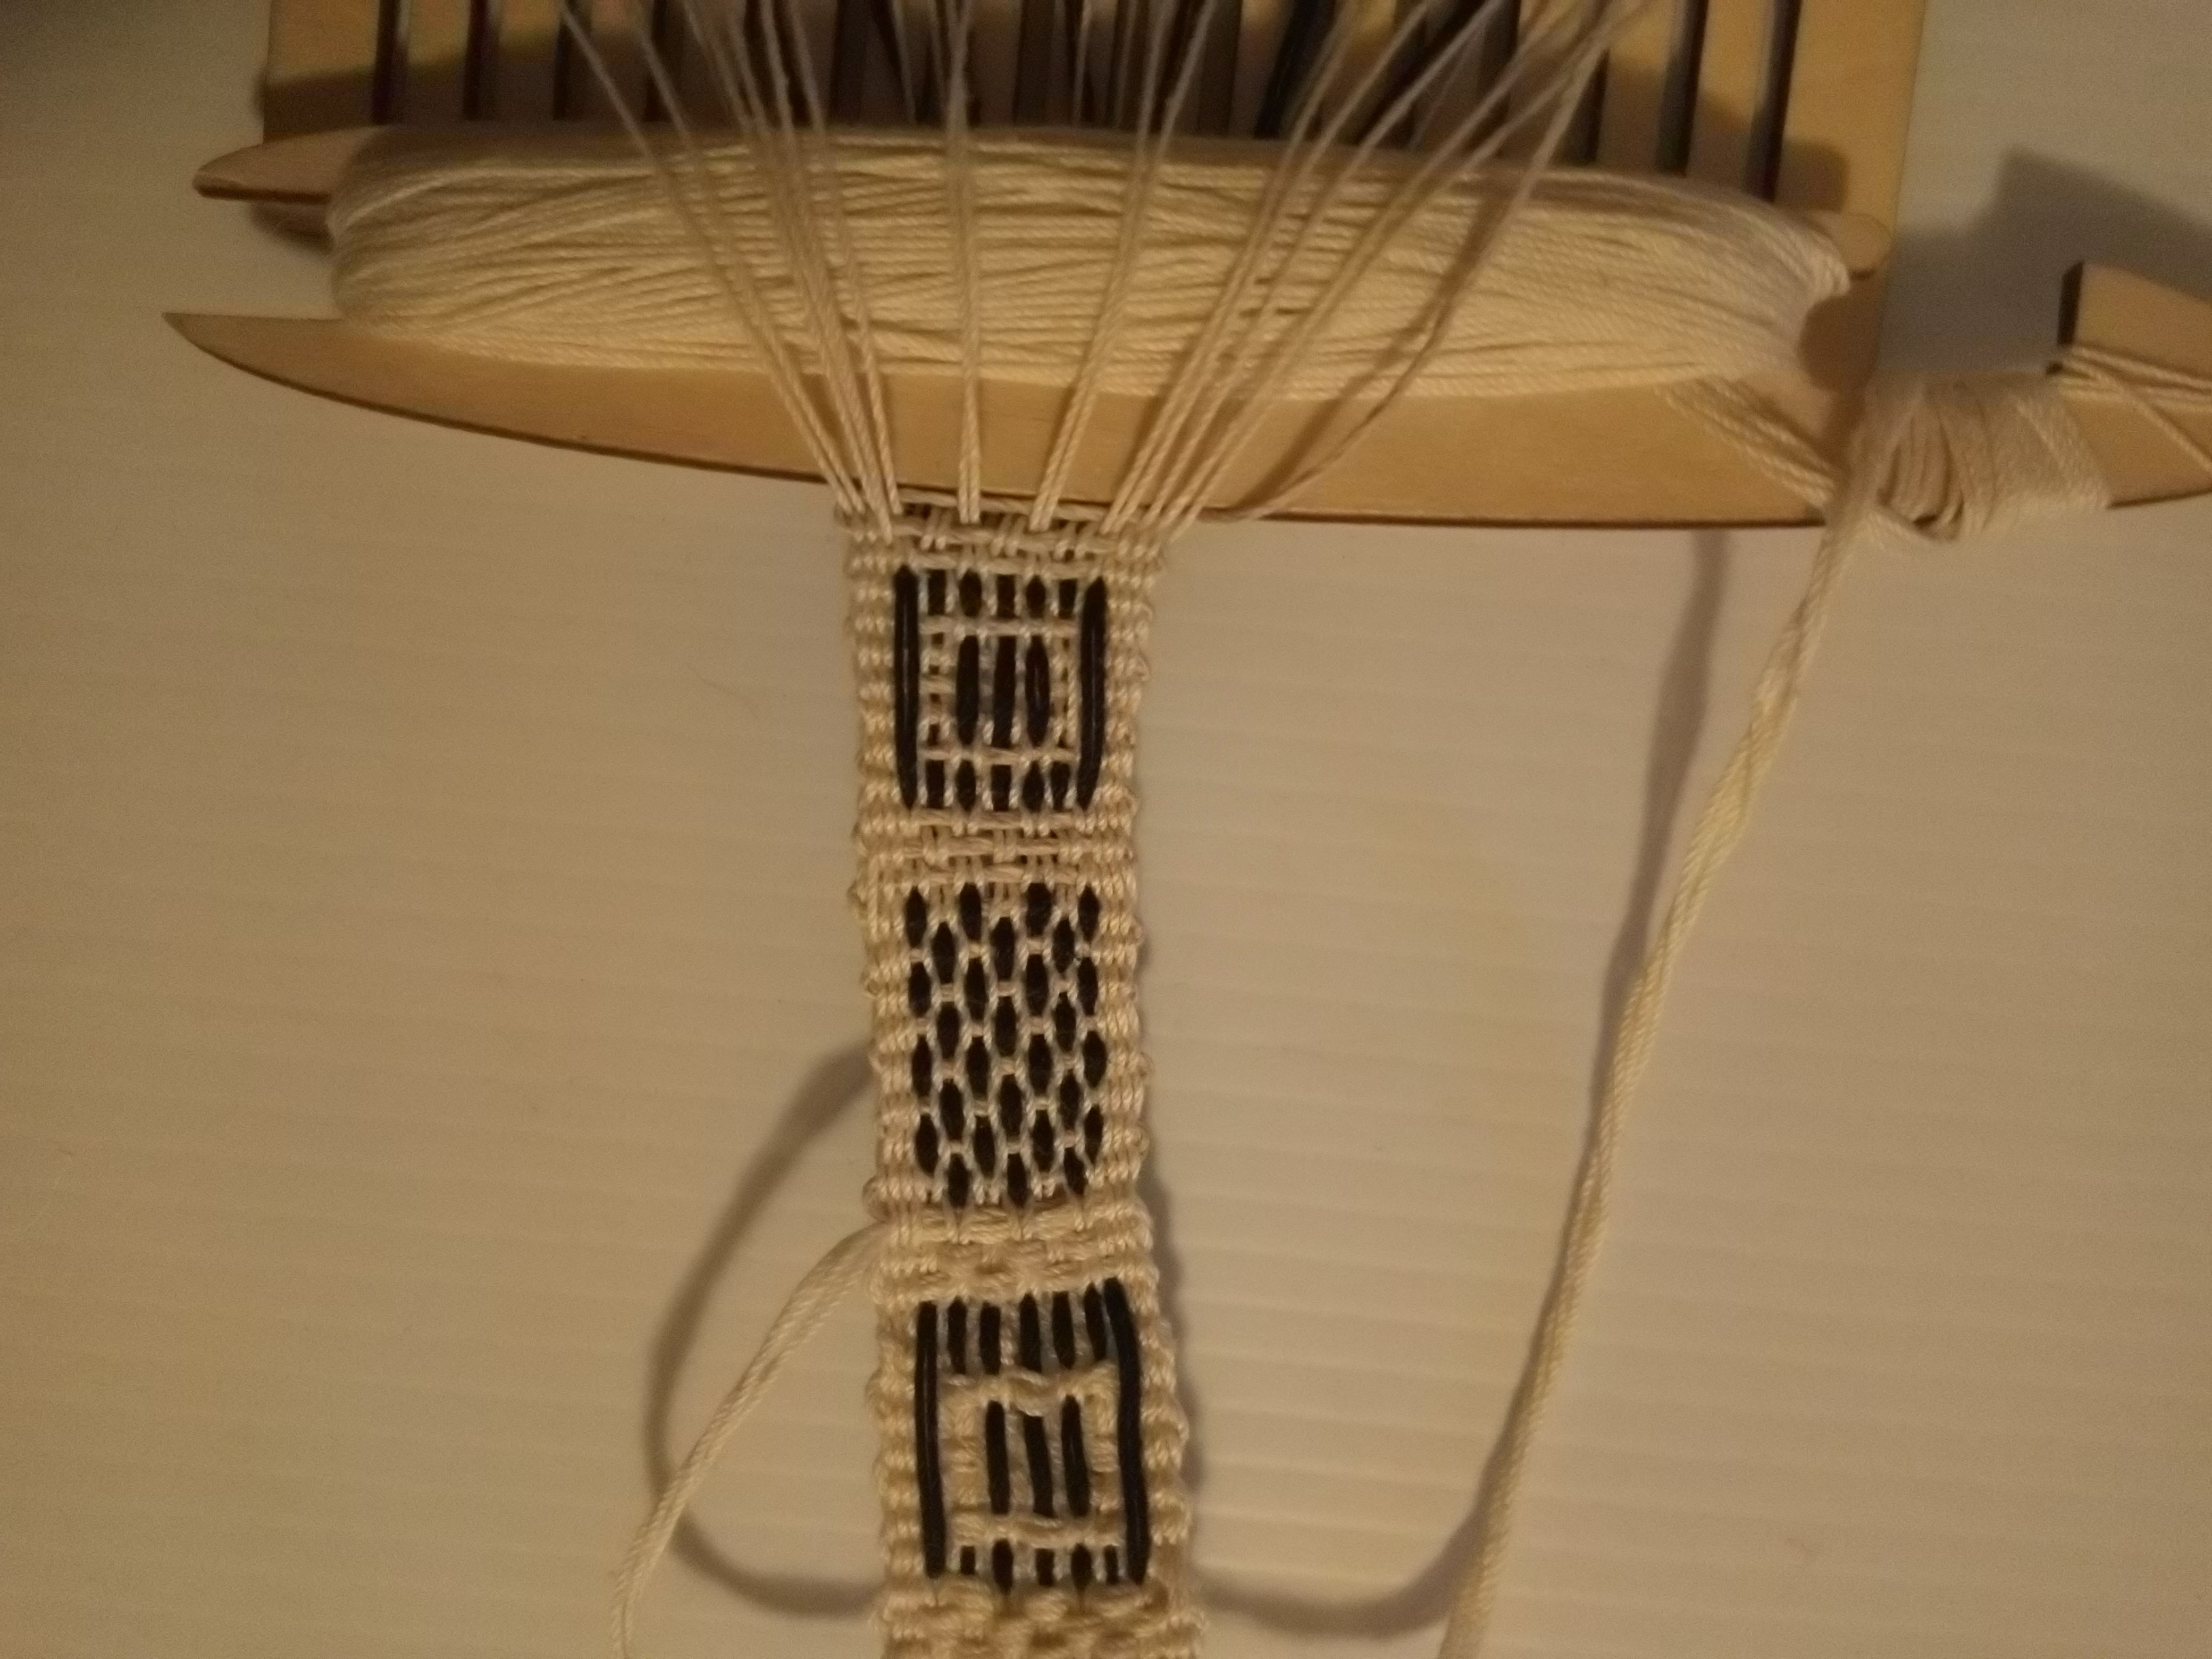
Figure 21: Bandgrind Session #7
Session #6
Session #6 was a change from wool to cotton threads (size 10).
For a picture, the output of Session #6 is the bottom square in the above Session #7 image.
Session #5
Session #5 was a second attempt at the finder pattern, the black start square. Last time with the wool threads.
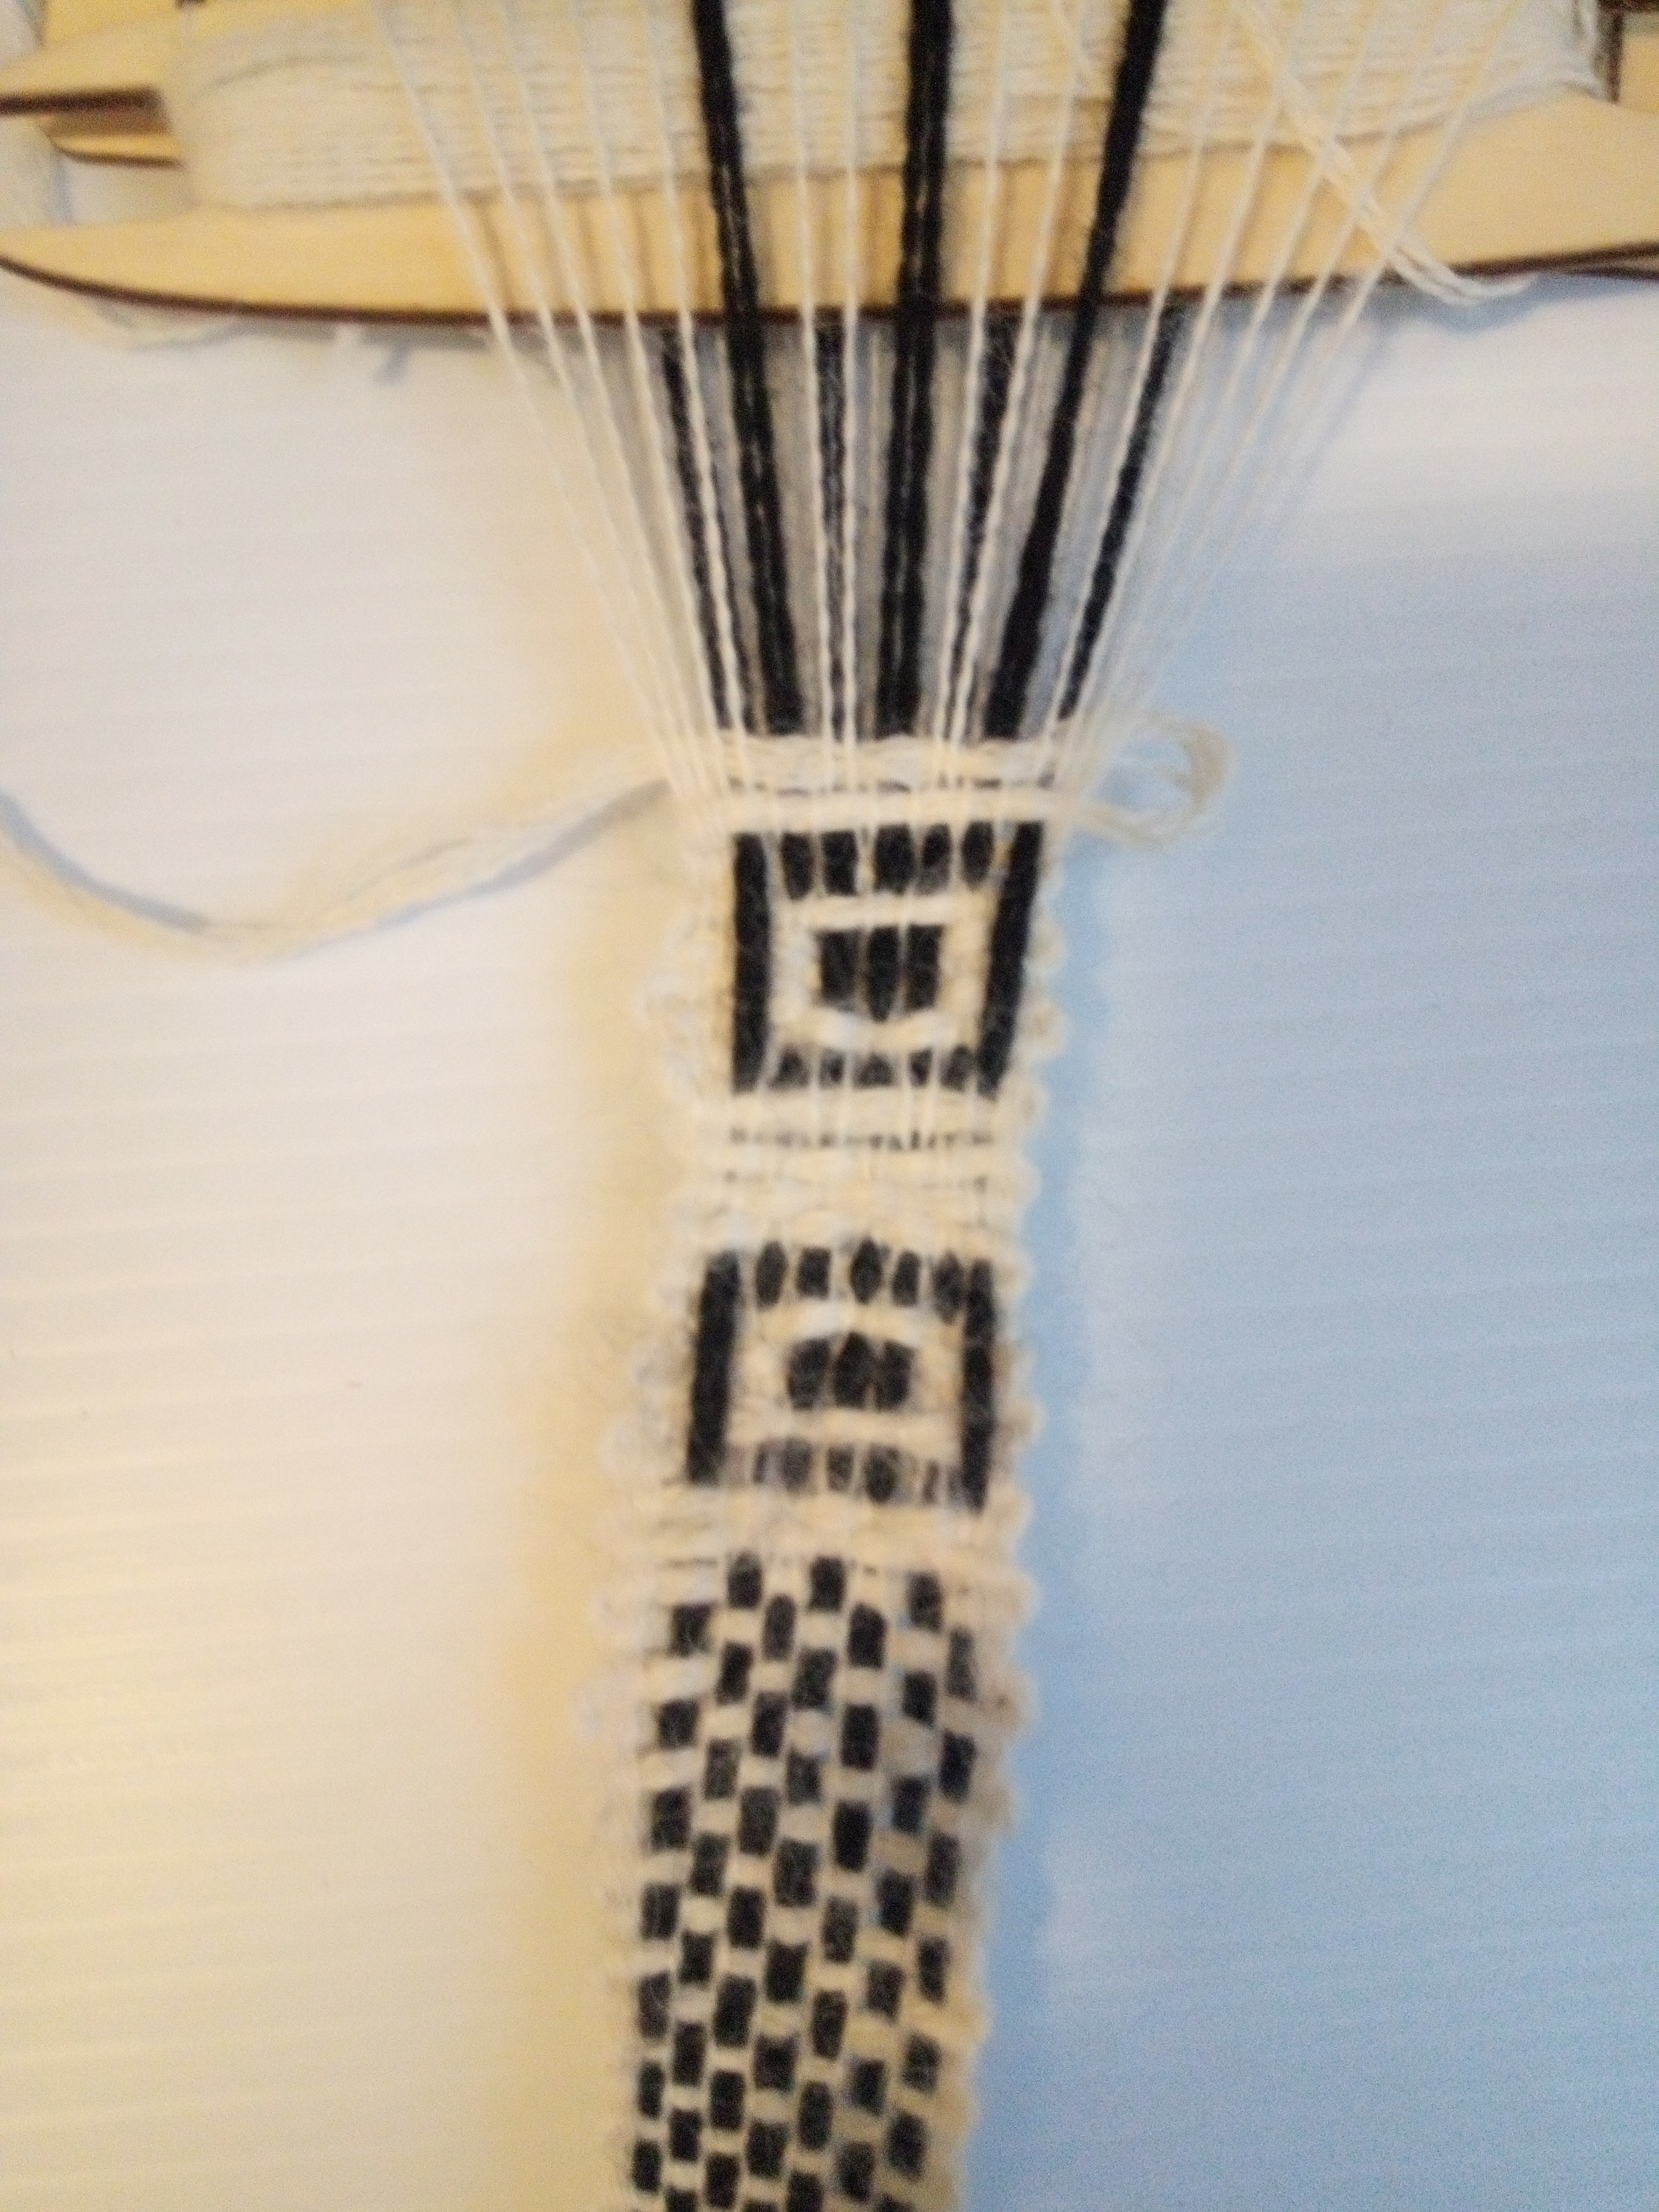
Figure 22: Bandgrind Session #5
Session #4
By the end of Session #3, "square enough" QR modules were happening. So, in Session #4 started trying to make rMQR components, starting with the black "finder" pattern i.e. the square that starts all rMQR codes:
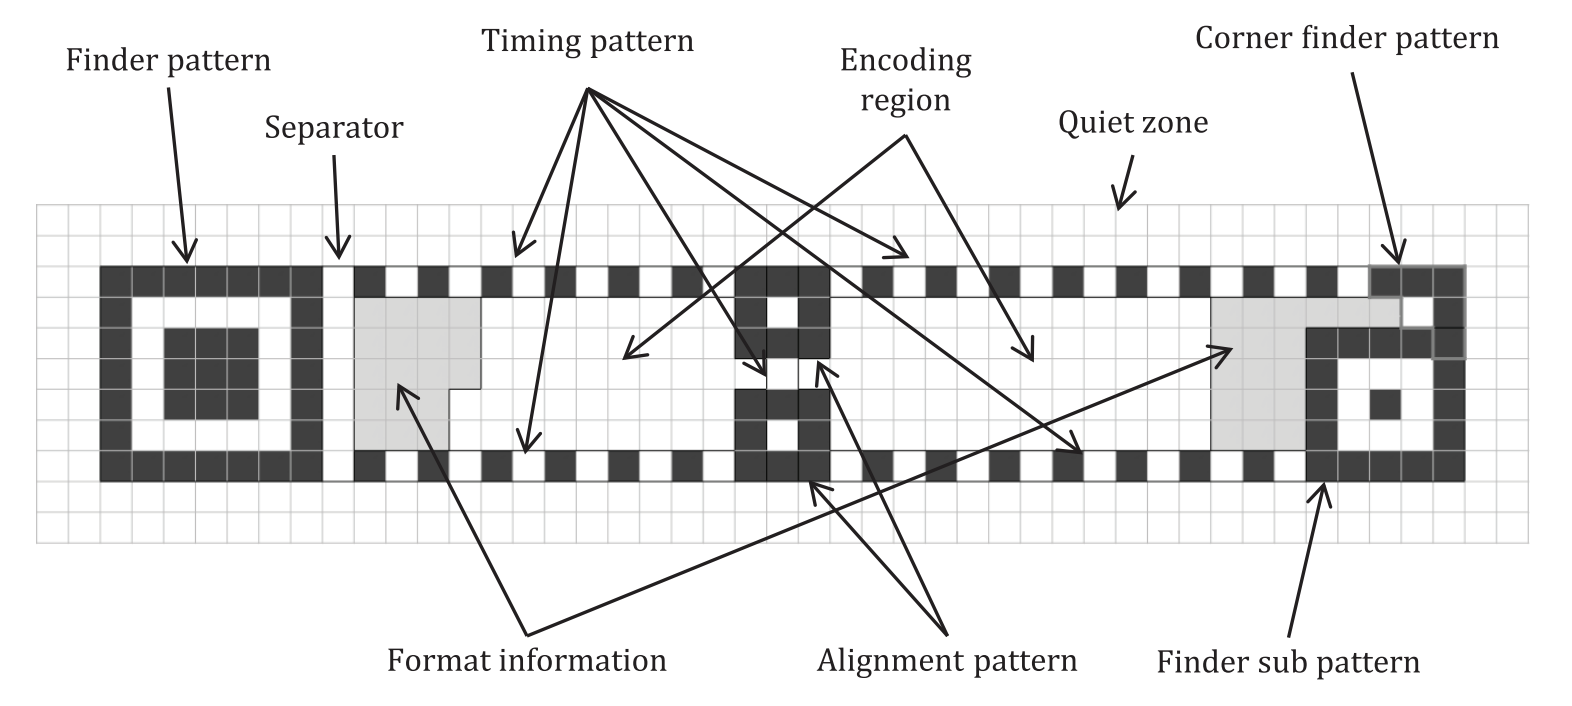
Figure 23: Structure of an rMQR
Still all wool:
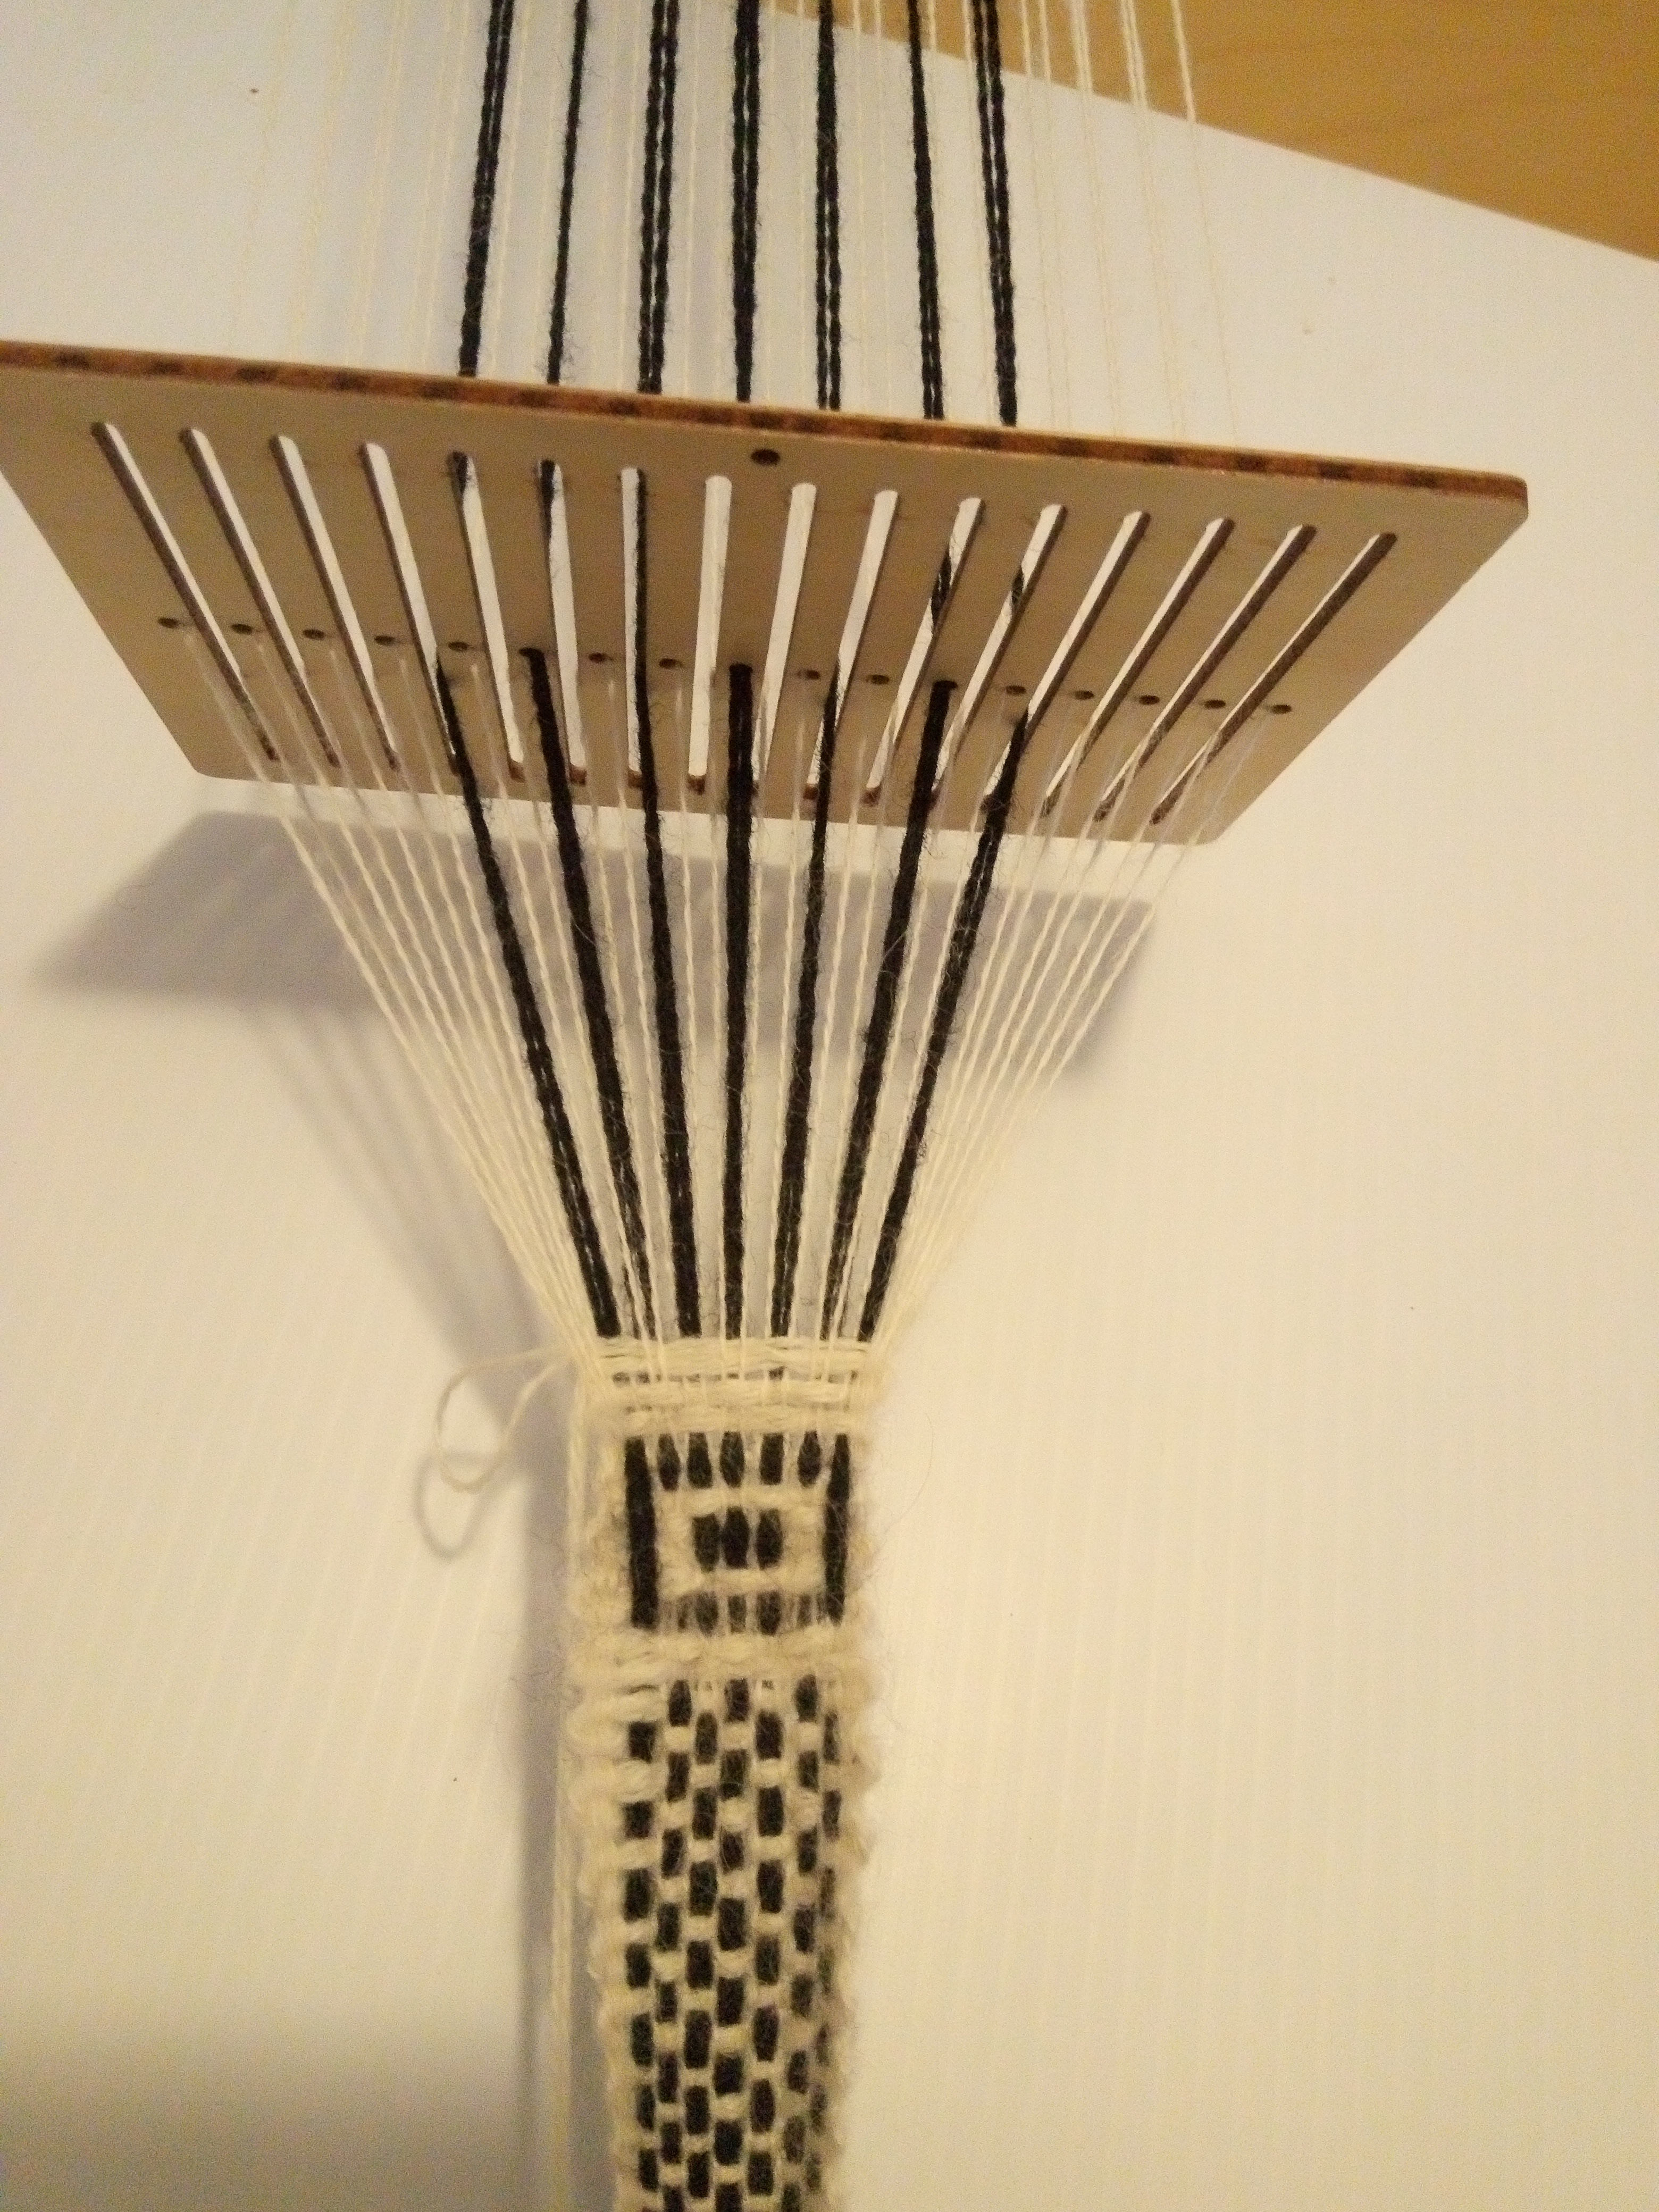
Figure 24: Bandgrind Session #4
Session #3
Addressing the "narrow" warp of Session #2, Session #3 saw a monotonic thickening of the weft. During the session, one then two then four threads were used to make the single white weft which eventually was as wide as the black warp.
Still wool threads all :(
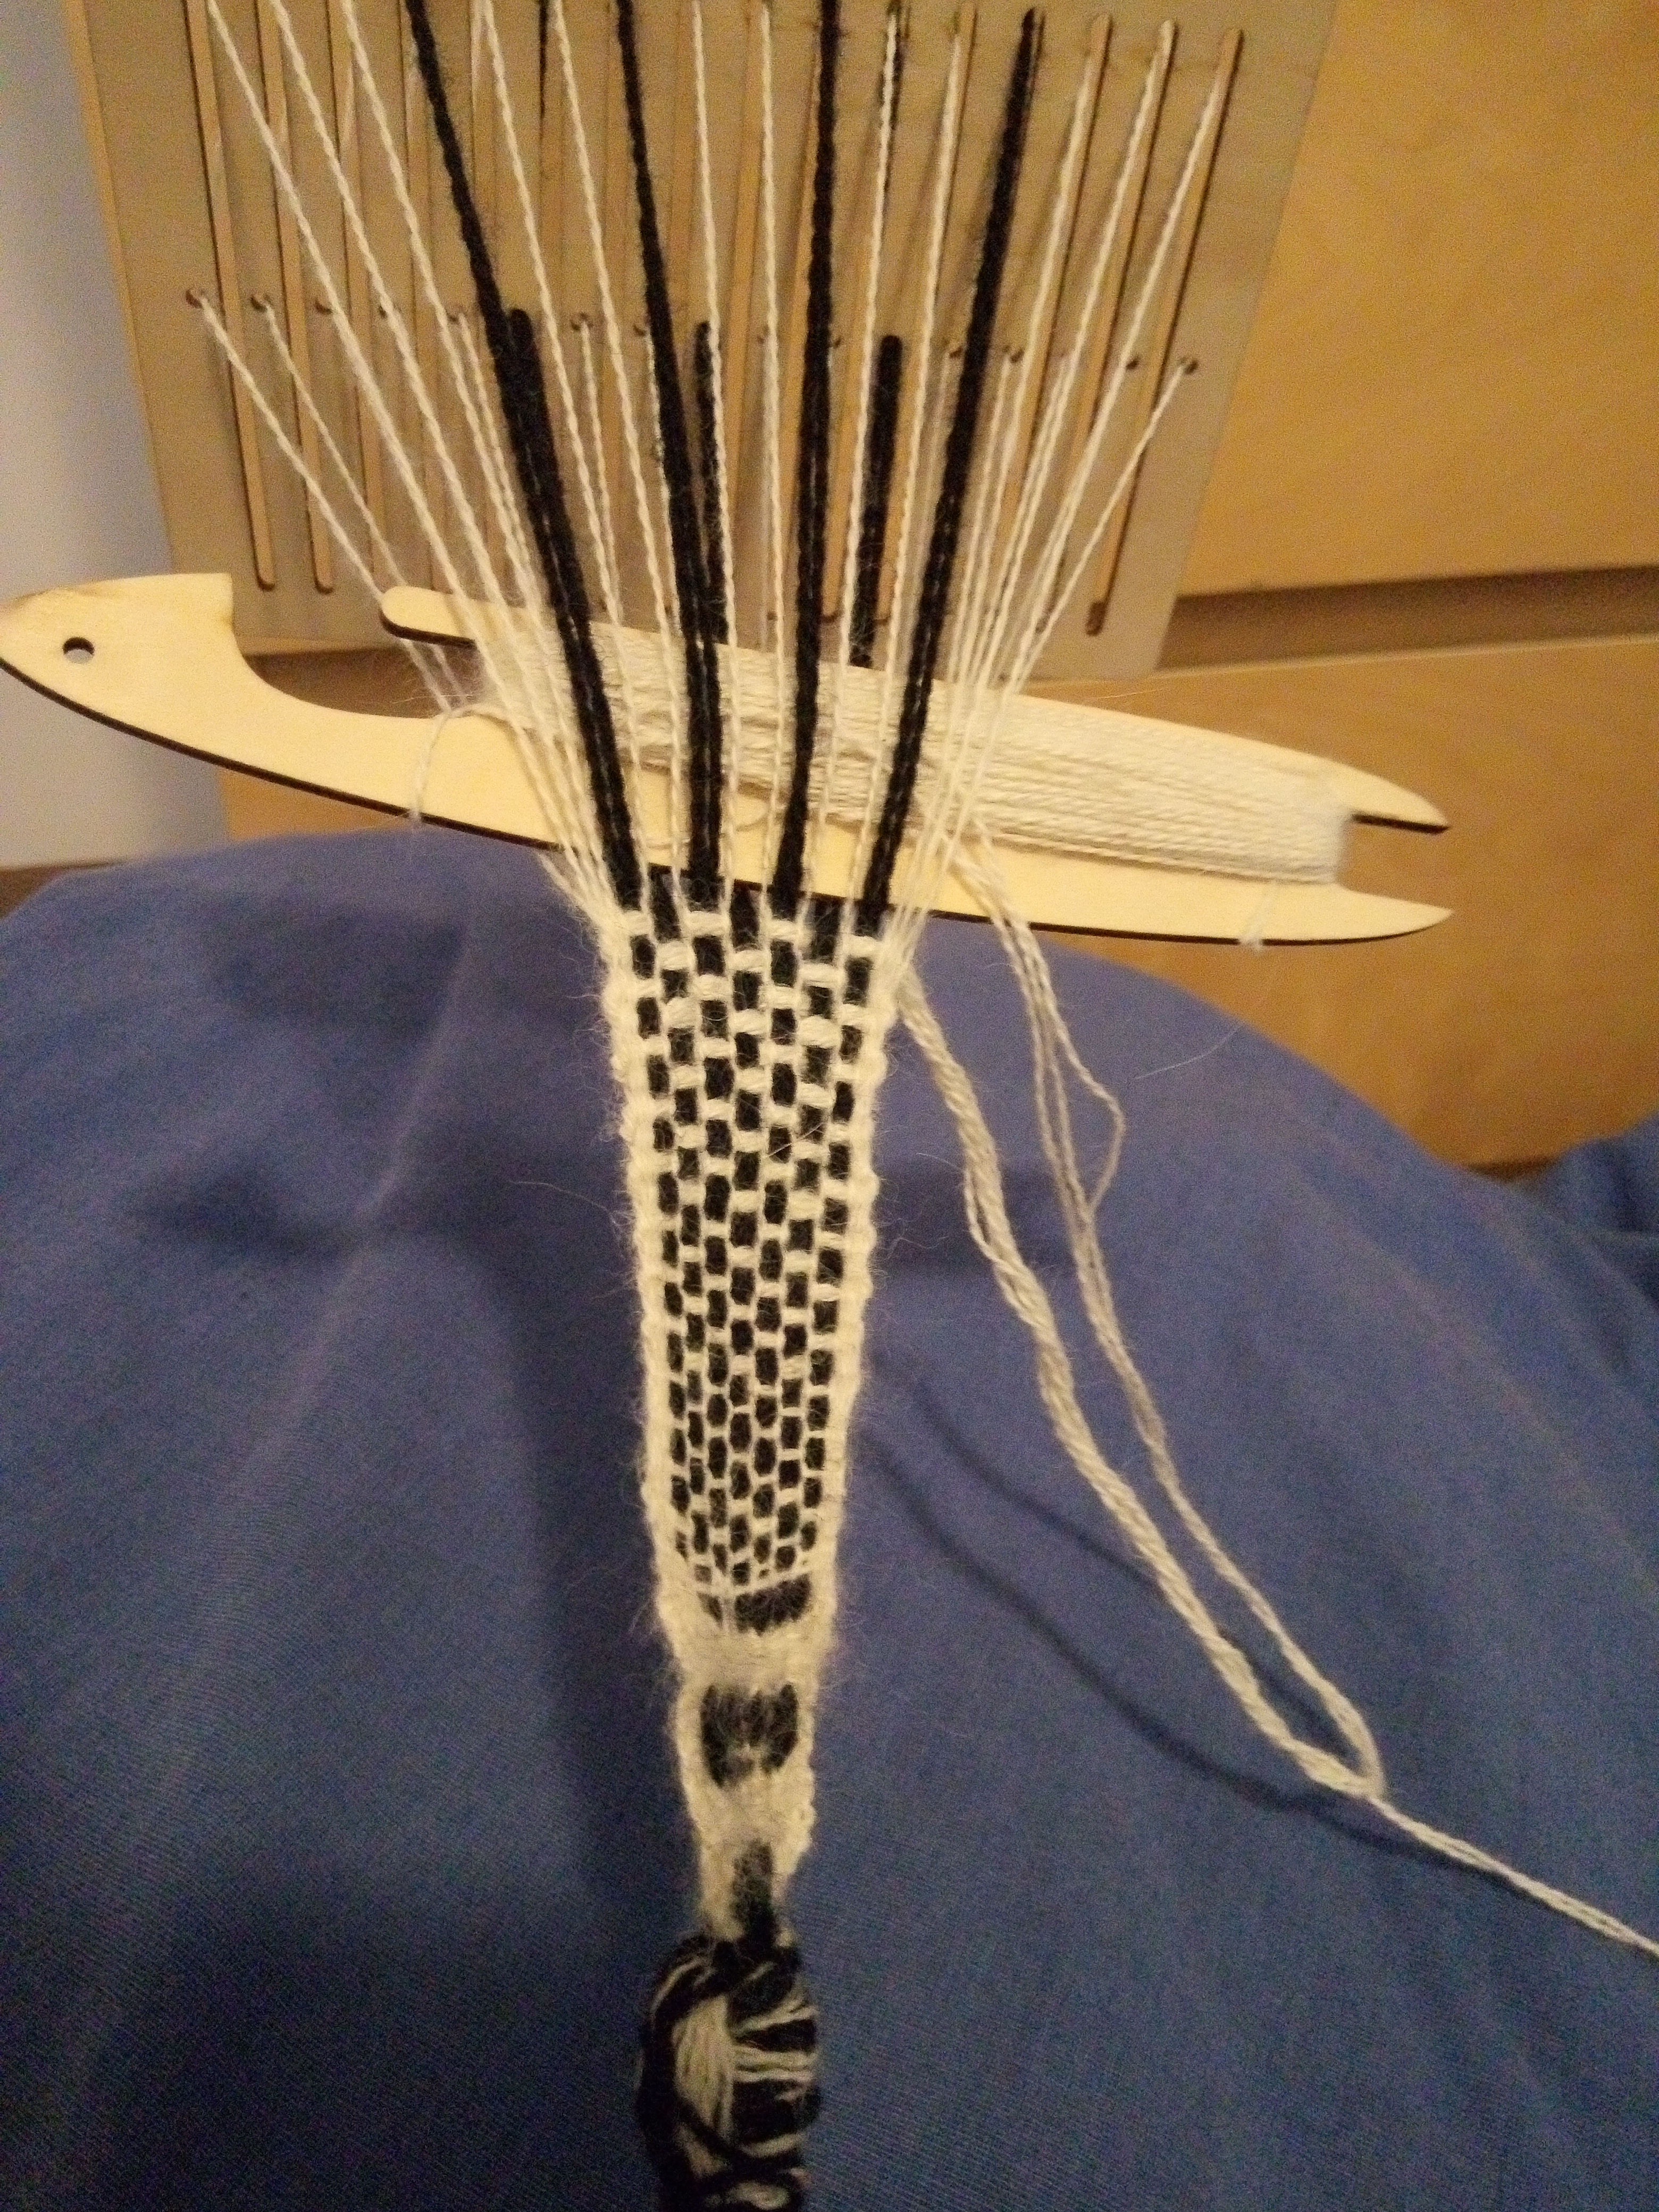
Figure 25: Bandgrind Session #3
Session #2
The black splotch at the start of the band is Session #1 :(
The white weft is showing (that will be suppressed staring around Session #9 with pure warp faced weaving) and if so needs to br much wider thread s.t. its width is equal to height of back warps.
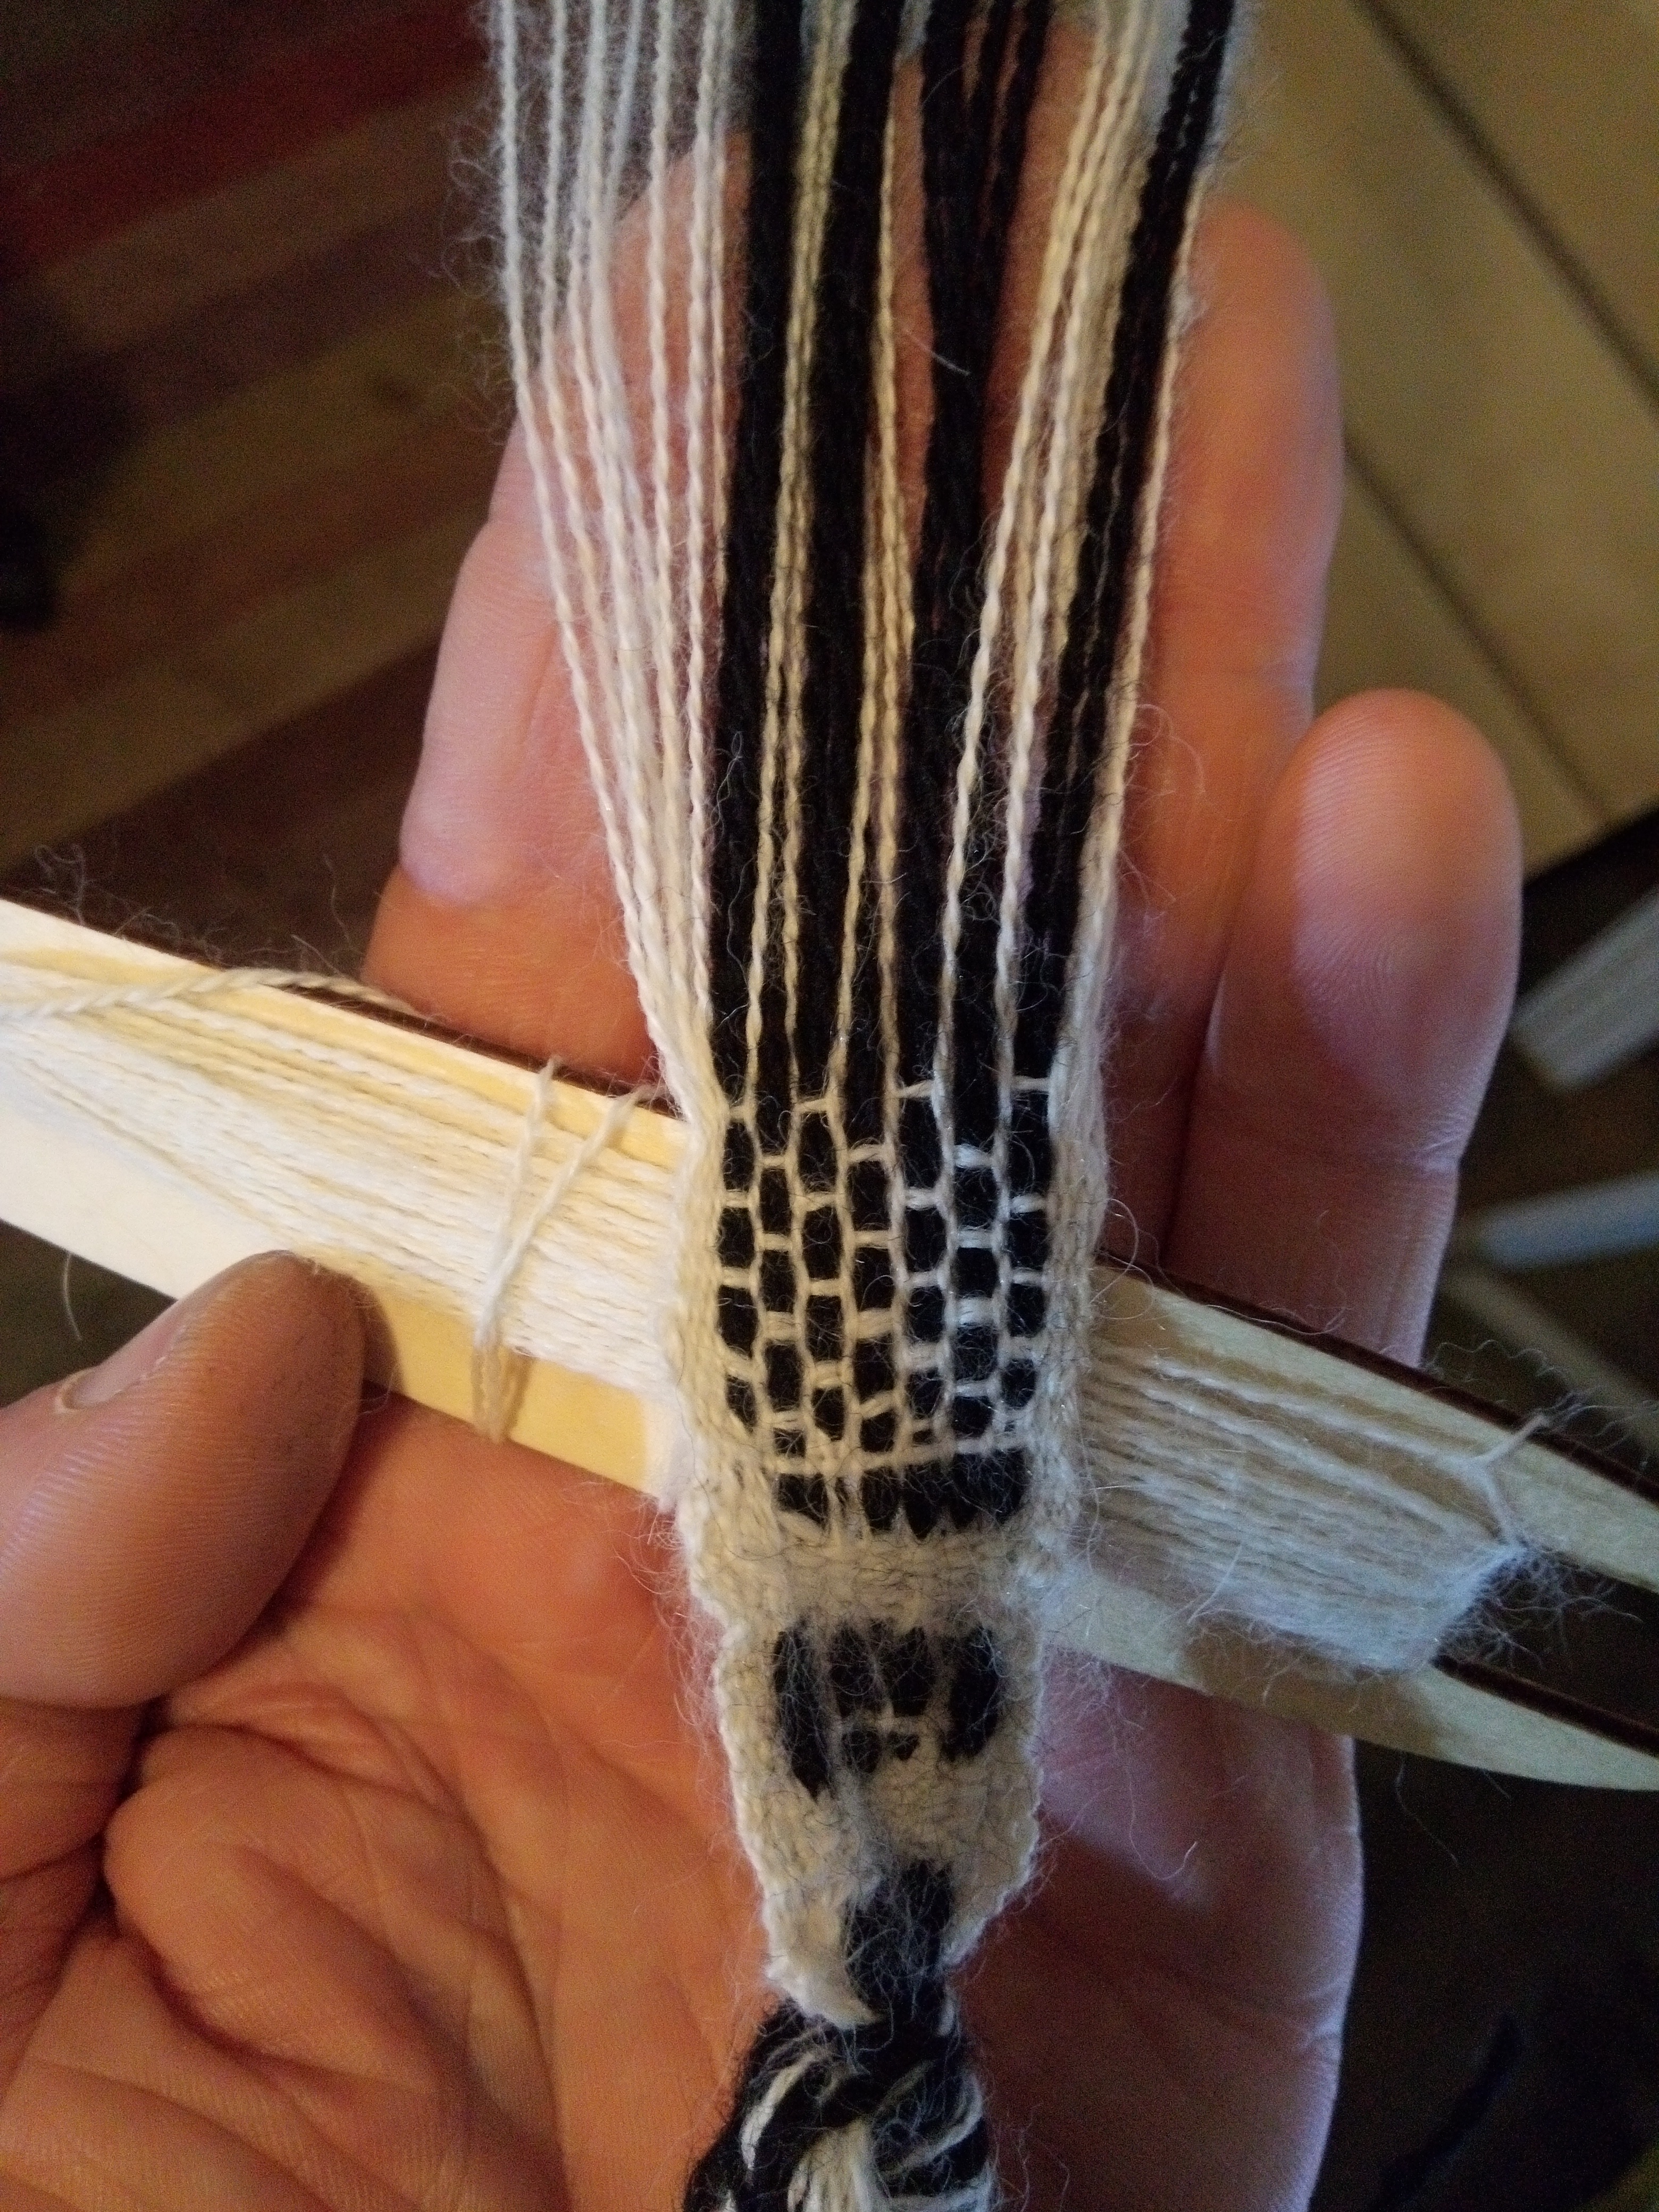
Figure 26: Bandgrind Session #2